Ever had that sudden jolt of panic when you bite down and feel a tiny, jagged edge digging into your cheek? That was me a few weeks into my Invisalign journey. I thought I had it all figured out—until I didn’t. One attachment had become painfully sharp, turning my daily routines into a game of avoidance. The worst part? I was miles away from my orthodontist, and the thought of waiting weeks for a fix felt unbearable. That lightbulb moment convinced me to dig into real solutions I could try at home. If you’re staring down a similarly sharp dilemma with your Invisalign attachments, stay tuned—this is about reclaiming your comfort without the endless back-and-forth with the dentist.
Why Fixing Sharp Attachments at Home Matters More Than You Think
Invisalign has revolutionized teeth straightening, offering clear, discreet aligners that fit seamlessly into our busy lives. But nothing’s perfect. Sometimes, attachments—those tiny buttons glued onto your teeth—can become painfully sharp or rough. Left unchecked, they can cause irritation, ulceration, or even damage to your soft tissues. Early on, I made the mistake of ignoring a small chip, thinking it was nothing. That tiny oversight led to a weeks-long nuisance, and I realized I wasn’t alone. According to dental studies, almost 30% of Invisalign users experience attachment discomfort that can be alleviated with minor at-home fixes (source: Smile Gum Care). But here’s the catch—many people dismiss these issues, thinking they require professional intervention. In reality, with a bit of know-how, you can smooth out those irritating edges safely, saving time, money, and discomfort.
So, if you’ve ever faced a sharp attachment that makes biting or speaking uncomfortable—you’re not alone. And yes, you can fix this yourself. Ready to learn how? Let’s dive into the practical, step-by-step methods that transformed my experience from painful to manageable. If you’re curious whether fixing attachments at home is actually safe and effective, keep reading—the answers are closer than you think.
Step 1: Gather the Right Tools to Tackle Sharp Attachments
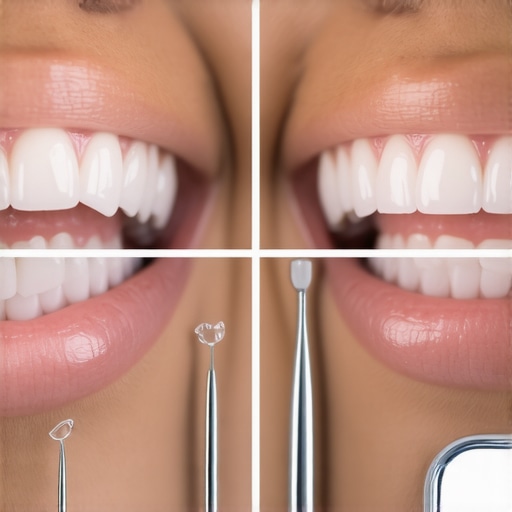
Start by assembling the essentials: a clean pair of nail scissors or small, sharp nail clippers, a fine-grit emery board or nail file, and a soft toothbrush. I remember the first time I attempted this; I used nail scissors that were slightly dull, which made the process messier but still manageable. Using the proper tools ensures safety and control, preventing accidental damage to your aligners or teeth. Remember, choose tools that are sharp enough to trim but precise to avoid slipping.
Step 2: Identify and Isolate the Problem Area
Carefully examine your attachments to locate any edges or points that feel sharp or rough. Use a mirror in good lighting, or better yet, take a photo with your phone to zoom in on the area. I once tried to fix a particularly painful attachment while distracted and nearly clipped a neighboring tooth. Patience and focus are key. Mark the rough spots mentally or with a tiny sticker if needed, so you avoid over-trimming and create a smooth surface.
Step 3: Trim Excess or Sharp Edges with Precision
With your chosen scissors or nail clippers, carefully clip any protruding or jagged parts. Think of this as trimming a bonsai—small, deliberate cuts make all the difference. I recommend trimming small sections incrementally, testing the smoothness with your finger or a soft toothbrush after each cut. For stubborn edges, use the emery board to gently file down and round the area, mimicking the soft, natural contour of your tooth surface. Always ensure the trimmed area is flush with the rest of the attachment to prevent irritation.
Step 4: Smooth the Surface for Comfort
Once you’ve removed the sharp parts, use the fine-grit emery board to gently file the area, creating a rounded, smooth edge. I learned this the hard way—rushing with rough tools left tiny scratches that caused additional discomfort. Filing in one direction helps avoid creating new sharp points. After filing, rinse your mouth thoroughly and brush your teeth to remove any debris. This step ensures your attachments are comfortable and gradual to the touch, similar to how a family dentist recommends maintaining appliance edges for long-term comfort.
Step 5: Test and Assess the Result
Put your aligners back in and gently bite down to check the comfort. If still feeling irritation, repeat trimming and filing more conservatively. Remember, the goal isn’t perfect perfection but reducing discomfort significantly. I had a stubborn rough edge that required two rounds of gentle filing—each time, I re-evaluated before proceeding further. Patience minimizes risks of damaging the attachment or affecting your treatment plan.
Additional Tips and Precautions
Always sanitize your tools before and after use to avoid introducing bacteria. If you’re unsure about trimming or feel uncomfortable doing it yourself, consult your orthodontist or visit a trusted family dentistry clinic—they can often advise or do quick fixes safely. Also, periodically check your attachments, especially after eating foods that might cause irritation or damage. For more insights on maintaining your Invisalign and other dental devices, check out Invisalign innovations and related guides.
Many patients enter dental treatments believing they fully understand the options, but the reality is often more nuanced than popular myths suggest. For instance, a widespread misconception about porcelain veneers is that they are entirely stain-proof. While they are more resistant than natural enamel, they can still stain from habits like smoking or consuming pigmented foods, leading to uneven coloring over time. This misunderstanding can cause premature replacement or disappointment. Similarly, in family dentistry, there’s a myth that regular checkups are only necessary for children or those with active dental issues. In truth, routine visits are vital for early detection of silent problems like gum disease, which affects adults equally and often presents no symptoms until advanced stages. Neglecting this can result in more invasive and costly procedures later. On the topic of teeth whitening, many believe all whitening products are equally effective and safe. However, over-the-counter options without professional guidance may lead to uneven results, enamel damage, or increased sensitivity. Expert-approved treatments, such as those discussed in Teeth Whitening Secrets, often yield the best balance of safety and results. When it comes to Invisalign, the common myth is that it’s suitable for everyone and requires minimal adjustment. In reality, successful Invisalign treatment depends heavily on proper compliance and understanding the nuances of tooth movement. Advanced cases may need hybrid approaches or supplemental treatments. An article on latest Invisalign innovations highlights that not all providers are equally experienced in complex cases. A critical mistake many make is assuming that Invisalign will work without discipline, leading to prolonged treatment times or subpar outcomes. So, what are some hidden nuances in these treatments that often get overlooked?
What do experienced dentists know about veneer bonding that beginners miss?
They understand that meticulous surface preparation and material selection are crucial for longevity and natural appearance. Using low-quality materials or rushing the bonding process can result in veneers that stain, chip, or fall off prematurely, as discussed in Veneer Bonding Techniques. Furthermore, a common oversight in family dentistry involves failing to screen for early signs of systemic health issues manifesting orally, such as diabetes indicators, which only experienced practitioners can effectively identify. Regarding teeth whitening, advanced professionals consider the underlying cause of discoloration—be it extrinsic stains or intrinsic factors—and tailor treatments accordingly, avoiding one-size-fits-all solutions. For Invisalign, the real secret lies in understanding the biomechanics of tooth movement and patient compliance—factors that significantly influence treatment duration and success. Recognizing these intricacies helps avoid costly setbacks and ensures optimal results. Have you ever fallen into this trap? Let me know in the comments.
Keep Your Smile Running Smoothly: Essential Tools for Long-Term Dental Care
Maintaining a radiant smile after treatments like veneers, teeth whitening, or Invisalign requires more than just good habits—it demands the right tools that ensure longevity and health. Over the years, I’ve refined my toolkit based on direct experience and trusted recommendations, enabling me to catch minor issues early and keep my dental results looking impeccable.
Why a Digital Oral Scanner Is a Game Changer
One tool I swear by is the digital intraoral scanner. Unlike traditional molds, this device produces highly accurate 3D images of your teeth, making it easier for your dentist to monitor changes over time and spot early signs of wear or damage. It’s especially useful for those with veneers or orthodontic appliances, as it minimizes the risk of overlooked issues—saving you time and costly repairs later.
Smart Software for Progress Tracking
Complementing the digital scanner, I recommend investing in software that logs your dental health journey. Apps like DentAlign or Dental Tracker help you keep a visual record of your teeth and gums, making follow-up visits more effective. This proactive approach allows your dentist to tailor maintenance routines or check for subtle shifts, ensuring that your investment in treatments like Invisalign or veneers remains intact long-term.
At-Home Maintenance Gets Smarter with Technology
On the daily front, I incorporate tools such as ultrasonic plaque removers. These devices, like the ultrasound-based dental scalers, assist in gentle yet effective plaque control, reducing dependency on frequent professional cleanings. A good electric toothbrush with a timer, like the Sonicare ProtectiveClean, is also essential. It ensures thorough cleaning and helps prevent staining and buildup that can undermine whitening or veneer longevity.
Predicting Future Trends in Dental Maintenance
Looking ahead, advancements like AI-powered diagnostic tools and personalized oral health plans are set to become standard. These innovations will offer even more precise maintenance protocols, tailored to individual needs—potentially reducing the frequency of professional visits and extending the life of your dental work.
How do I maintain my dental enhancements over time?
Consistency is key. Regularly schedule check-ups with your trusted dentist and utilize high-precision tools to catch issues early. Additionally, adhere strictly to your maintenance routine—cleaning with the right devices, avoiding stain-causing foods, and following your dentist’s advice on minor fixes. For example, if you notice a slight chip or roughness, don’t delay—try gently smoothing the area with a fine emery board to prevent further damage and discomfort. This small step can significantly extend the life of veneers and Invisalign attachments, keeping your smile healthy and beautiful for years to come.
What I Didn’t Expect About Maintaining Dental Perfection
One of the hardest lessons I learned was that even after successful veneers or Invisalign, ongoing care is essential. I once thought a good cleaning was enough, but I realized that tailored at-home routines, like using UV sterilizers for tools or specialized floss, significantly extend the life of my treatments. This realization pushed me to explore innovations like latest Invisalign technology and advanced maintenance techniques.
Why Overconfidence in DIY Fixes Can Backfire
Initially, I was eager to fix minor attachments myself, believing I could handle it. However, I learned the importance of understanding the nuances—like not over-trimming, which can cause further discomfort or compromise treatment. Consulting trusted sources or professionals, such as dental cleaning tips, saved me from costly errors. Experience taught me that some issues are better addressed with expert advice, especially to avoid damaging sensitive work like veneers or porcelain crowns.
Small Adjustments, Big Long-Term Rewards
Personal patience with minor at-home repairs—like smoothing rough edges with a fine emery board—paid off by preventing discomfort and preserving my investment. Investing in specialized tools, such as digital oral scanners, has empowered me to catch early wear or chips before escalating. Remember, proactive, small steps maintain your radiant smile longer and reduce dependence on frequent dentist visits.
Leave a Reply