How to stop your aligners from catching on your inner lip
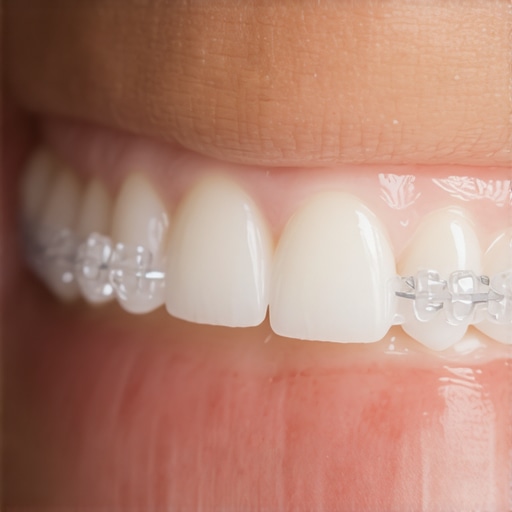
I remember sitting in a high-stakes business meeting, trying to look composed while my bottom aligner was effectively auditioning for a role as a meat tenderizer on my lower lip. Every time I spoke, the sharp edge of the plastic snagged on the soft tissue, creating a stinging sensation that made me want to rip the trays out right then and there. It is a visceral, localized frustration that most people do not warn you about when you sign up for your smile transformation. If you are currently nursing a sore spot or feeling like your mouth is a construction zone, I promise there is a way to wear your trays without the constant ouch factor. Today, we are going to dive into the simple, neighborly fixes I wish someone had whispered to me on day one.
Stop the Shredding Once and for All
I spent the first two weeks of my treatment convinced that I just had a sensitive mouth. I even started wondering how to fix the clicking sound in my jaw because I was holding my mouth so tensely to avoid the snagging. The reality is that invisible braces changing smiles across the world are incredible pieces of tech, but they are mass-manufactured. Sometimes, the laser-cutting process leaves a microscopic burr or a slightly high profile that catches the oral mucosa. When I first felt that irritation, I made a classic rookie mistake: I tried to use a heavy-duty metal nail file to smooth it out. I ended up creating a jagged, frosted mess that felt like sandpaper. Do not do that. Instead, I learned that a very specific type of orthodontic wax and a gentle touch are your best friends. Have you ever found yourself frantically searching for a piece of sugar-free gum just to use as a makeshift cushion for your lip? It is a common struggle, but we can do better than that.
Is this constant irritation just a normal part of the process?
A lot of people worry that if they complain about the trays catching, their dentist will think they are just being difficult. But the truth is, your comfort is a huge part of compliance. If it hurts, you will not wear them for the required 22 hours a day. According to the American Association of Orthodontists, while the oral mucosa is incredibly resilient, consistent mechanical irritation can lead to painful hyperkeratosis or ulcerations if left unaddressed. I found that using the best way to soothe a sore mouth after an orthodontic adjustment involves a mix of topical relief and proactive tray management. I also realized that my habit of fidgeting with my tongue was actually pushing my lip into the sharp edge. Even simple things like learning the trick to eating with clear aligners helped me understand how my mouth moves and how to minimize the friction. We are going to walk through the exact steps to identify the hot spots on your trays and how to address them without ruining your investment. Have you faced this specific problem with a new tray recently?
Pinpoint the Sharp Spot with the Fingertip Test
Before you start hacking away at your expensive trays, you need to identify the exact point of friction. Your mouth is a sensitive environment where a tiny millimeter feels like a mountain. Wash your hands and run your index finger slowly along the inner and outer edges of the aligner while it is out of your mouth. You are looking for a “burr”—a tiny piece of leftover plastic from the manufacturing process. Once you find it, mark the spot mentally. I remember the first time I did this, I realized the snag wasn’t where I thought it was; the pain was radiating from a spot much further back in my cheek than the actual irritation point. This is also a great time to ensure you are practicing invisalign secrets achieving a perfect smile discreetly by keeping the trays clear of any debris before you put them back in.
Smooth the Plastic with a Fine-Grit Emory Board
I once made the mistake of grabbing a heavy-duty metal file from the garage—total disaster. I ended up with a tray that felt like it had been chewed by a dog. The secret is using a fine-grit emory board, the kind meant for natural nails, not acrylics. Lightly buff the edge in one direction only. Think of it like sanding a fine piece of furniture; you are removing a microscopic layer, not reshaping the whole piece. After a few strokes, try the tray back in. If the snag is gone, you must learn how to get rid of the plastic aftertaste from new invisalign trays by giving them a thorough rinse, otherwise, you will be tasting acrylic dust all afternoon. This manual adjustment is often the difference between wearing your trays for the full 22 hours or giving up by lunchtime.
Create a Temporary Shield with Orthodontic Wax
Sometimes the edge isn’t necessarily sharp, but it sits too high on the gum line, causing a constant pressure sore. If filing doesn’t solve it, orthodontic wax is your safety net. Take a pea-sized amount, roll it between your fingers to warm it up, and press it firmly over the edge of the aligner. This creates a smooth bumper between the plastic and your soft tissue. It is a lifesaver during those first few days of a new tray. While you are focusing on comfort, remember that the best way to store your clear aligners when you arent wearing them is in their case, as wax can attract lint and dust if the trays are left on a nightstand. Using wax allows your mouth to toughen up naturally without the constant trauma of a sharp edge.
Help Your Gums Heal from Initial Scrapes
If you have already developed a localized ulcer or a raw spot, smoothing the tray is only half the battle. You need to treat the tissue. A warm saltwater rinse—half a teaspoon of salt in a cup of water—is the most effective way to speed up the healing process. It reduces inflammation and cleans the area without harsh chemicals. I found that doing this twice a day during a tray change kept my mouth from becoming a construction zone. If you notice other issues during this phase, such as how to fix the small gap that appeared between your front teeth, don’t panic; it is often part of the planned movement, but staying comfortable ensures you actually see those results. Proactive management of these hot spots keeps your treatment on track and your sanity intact.
But here is where things get interesting—and where most people accidentally sabotage their progress. While smoothing out a sharp aligner tray is a quick win, the long-term health of your smile often hinges on nuances that feel counterintuitive. For instance, in the world of cosmetic dentistry, there is a pervasive ‘more is better’ myth that leads many people into a painful trap. Everyone assumes that using the highest concentration of peroxide possible is the fast track to a Hollywood smile, but in my experience, pushing the limits usually leads to ‘dehydration whitening’ rather than true shade improvement. When your teeth lose too much moisture during a session, they look bright for forty-eight hours and then ‘rebound’ to a darker shade almost immediately once they rehydrate. This cycle often leads patients to over-apply chemicals, which is why learning how to manage the zingers after a professional whitening session becomes a necessity rather than an option.
Why More Whitening Gel Isn’t the Answer
The ‘oops’ factor here is significant. If you keep hitting your enamel with high-intensity bleaches, you risk reaching a point of diminishing returns where the teeth actually start to look translucent or ‘hollow’ rather than white. A study published in the Journal of Evidence-Based Dental Practice highlights that aggressive bleaching can temporarily alter the surface morphology of enamel, making it more prone to extrinsic staining immediately after the session if not managed with a proper remineralization protocol. This is specifically why your teeth look gray instead of yellow and how to fix it involves stopping the bleach and starting a calcium-phosphate treatment. It is a sophisticated balance that many DIY kits completely ignore.
Can you actually over-whiten your teeth into a permanent gray?
Yes, and it is a nightmare to reverse. When the inner dentin is over-exposed or the enamel becomes too thin from abrasive ‘natural’ remedies, the dark shadows of the inside of your mouth start to show through the tooth. This is why I always caution against the trendy TikTok hacks. For example, the truth about charcoal toothpaste and your tooth enamel is that it is often far too abrasive for daily use, effectively sanding down your protection in exchange for a temporary scrub. Have you ever fallen into this trap of trying a ‘natural’ remedy that made things worse? Let me know in the comments.
Treat Your Veneers Like Fine China Not Solid Stone
Another nuance people get wrong involves porcelain. Many patients believe that once they get veneers, they are ‘immune’ to dental issues. While it is true that porcelain does not decay, the tooth structure underneath it absolutely can. This is why you must stop brushing your veneers like they are real teeth with abrasive pastes. Using a gritty toothpaste can create microscopic scratches that eventually trap bacteria and stains, leading to the mystery of why your porcelain veneers look dull after five years of wear. It is about a specialized maintenance routine that preserves the bond and the luster simultaneously.
Beyond the Basics of Family Dentistry
Finally, we have to talk about the ‘family’ aspect of care. Too often, people view family dentistry building healthy smiles for every generation as just a convenience for scheduling. The hidden nuance is that oral biomes are shared within households. If a parent has untreated periodontal issues, they can actually pass those specific bacteria to their children. True expertise in this field isn’t just about filling cavities; it is about managing the bacterial ecosystem of the entire home. By shifting your focus from ‘fixing’ to ‘preventing’ at a systemic level, you ensure that the sharp edges and sore spots we discussed earlier are the only drama your mouth ever has to deal with.
Once you have put in the work—navigating the scratchy aligner edges and mastering the delicate chemistry of whitening—the focus shifts from transformation to preservation. I treat my oral health like a high-performance engine; I do not just wait for a breakdown, I use the best tools to keep it humming. My absolute ‘must-have’ tool is a high-frequency ultrasonic cleaner. I use mine every single morning for my retainers. Why? Because even with the best manual scrubbing, you are often just pushing bacteria into microscopic pores in the plastic. A study in the International Journal of Dentistry confirms that ultrasonic cavitation is significantly more effective at disrupting biofilm than mechanical brushing alone. This is also how I have learned how to properly clean a night guard to prevent bacterial buildup without scratching the material, which avoids creating a breeding ground for future odors.
Upgrade Your Toolkit for Permanent Success
Maintenance is where most people get lazy, and it is where the most expensive failures happen. For those of us with permanent hardware, you need more than just standard floss. I personally use a combination of a water flosser and stiff-ended threaders because the best method for flossing under a permanent lingual retainer requires getting into the tight spaces that a normal string simply skips. If you have moved into the maintenance phase of invisalign innovation invisible braces changing smiles in your household, you know that keeping the gear clean is half the battle. I also recommend a dedicated ‘enamel-safe’ kit for your travel bag, including a reusable metal straw. It sounds niche, but knowing how to clean a reusable straw to protect your enamel ensures you can enjoy your iced coffee without bathing your newly whitened teeth or expensive veneers in acid and pigment.
How do I keep my smile looking fresh for the next ten years?
The secret is a ‘phased’ maintenance approach. You cannot treat a ten-year-old veneer the same way you treat a fresh one. Over time, the margins where the porcelain meets the tooth can become vulnerable. This is why ensuring family dental care what parents need to know in 2025 involves shifting to non-abrasive, high-fluoride gels rather than standard whitening pastes. If you are a tea or coffee lover, you have to be tactical. I have found that how to keep your teeth white without giving up black tea isn’t about scrubbing harder; it is about the timing of your rinses and the use of a professional-grade sealant every few years. When you transform your smile with veneers expert tips often focus on the ‘before and after,’ but the real magic is in the ‘ever after’ through consistent, low-abrasion care.
Look Toward the Digital Future of Smile Care
I predict that in the next five years, the ‘family dentist’ experience will become almost entirely preventative through home-based AI monitoring. We are already seeing the beginning of this as the real reason culpeper dentists are swapping traditional x-rays for 3d scans is to create a digital ‘baseline’ of your mouth. Soon, you will likely use your smartphone to scan your teeth once a month, and an AI will alert you if it detects a microscopic chip in a veneer or a slight shift in your alignment before you even feel it. This proactive technology will turn family dentistry building healthy smiles for every generation into a data-driven science rather than a game of ‘wait and see.’ For now, my best advice is to start small: grab an ultrasonic cleaner today and stop the ‘scrub-and-scratch’ cycle that ruins retainers and veneers alike.
The Lessons I Learned the Hard Way About Smile Transformations
I used to think that a perfect smile was just about the final reveal, but the real work happens in the quiet moments between tray changes and whitening sessions. I realized that forcing a tray to ‘fit’ when it was clearly cutting my gums wasn’t being tough; it was being counterproductive. I also learned that you can’t rush the biological clock of your teeth. Pushing for faster results often leads to more sensitivity than shade improvement. Lastly, I discovered that your local dentist is a partner, not just a service provider. When I stopped trying to hack my way through pain and started asking for professional tweaks, my results skyrocketed.
Tools That Actually Make Dental Maintenance Easy
If you want to keep your results, you need more than just a standard toothbrush. I swear by my ultrasonic pod for deep cleaning everything from retainers to night guards. I also highly recommend looking into the ultimate guide to teeth whitening options in 2025 to find a system that prioritizes enamel health over raw bleaching power. For those with porcelain, veneers made simple transform your tooth aesthetics in 2025 at 1822 offers the best insight on preserving that ‘day one’ shine without using abrasive chemicals. Finally, I keep a stash of medical-grade silicone wax; it stays put much better than the cheap paraffin stuff.
Take the First Step Toward Your Forever Smile
Transforming your look is an investment in your confidence, and it shouldn’t be defined by sharp edges or constant discomfort. Whether you are navigating the nuances of aligners or looking for family dentistry tips creating a healthy smile for your kids at 0915, remember that consistency beats intensity every time. Your journey through family dentistry is unique, and you have all the tools you need to make it a success. If you ever feel stuck, don’t hesitate to reach out for professional advice to get back on track. Have you ever struggled with a sharp spot on your aligners that felt impossible to fix? Let me know below!