The Simple Way to Fix a Rubbing Wire on Your Kid’s Braces
One evening, I was helping my daughter get ready for bed when she suddenly cried out, clutching her cheek. Turns out, a tiny wire from her braces had poked her gum again—an all-too-familiar situation in our journey with orthodontics. That moment hit me like a ton of bricks. I realized that dealing with those irritating wires was not just a minor inconvenience but a recurring challenge that can turn even a simple evening into a tense ordeal.
The Frustration of a Rubbing Wire
If you’ve ever watched your kid wince during their braces treatment, you know how upsetting it can be. Wires are meant to straighten teeth, but they can sometimes become misaligned or extend too far, rubbing against the inside of your child’s cheek or gums. It’s enough to make any parent feel helpless. I remember thinking, There has to be a straightforward way to fix this quickly, without emergency visits or causing more discomfort.
In our experience, the solution isn’t as complicated as it seems. Today, I want to share with you the simple tricks I’ve learned over the years for fixing those pesky wires—so you can keep your child’s smile happy and avoid unnecessary trips to the orthodontist. Because as a parent, nothing beats a smooth, comfortable experience for your kid, especially during the delicate phase of braces.
Why Fixing a Rubbing Wire Matters
Beyond discomfort, a wire poking into soft tissue can lead to sores, infections, or even delay the progress of orthodontic treatment. Addressing it promptly prevents larger issues down the line. According to a recent study, proper adjustment of braces components can reduce the chances of oral sores and ensure better overall outcomes (source: Smile Gum Care). This is why I emphasize the importance of understanding simple, effective fixes you can do at home.
But I’ll admit, the first time I faced this problem, I was a bit anxious myself. I made the mistake of trying to fix the wire with a regular household tool—only to realize that I was risking damaging the brace or hurting my child. It was a lesson in patience and careful handling, and I learned that a few basic supplies and some know-how could make all the difference.
So, if you’re exhausted from the endless pokes and tears over tiny wires, don’t worry. We’re about to dive into an easy, step-by-step approach that I’ve successfully used countless times. If this is a problem you’ve faced more than once, stay with me—you’re about to discover a quick fix that could save your evening, your child’s comfort, and maybe even your sanity.
Ready to restore peace and comfort to your child’s orthodontic journey? Let’s get started with the key tools you’ll need and simple tricks that make all the difference.
Prepare Your Tools and Environment Carefully
Before attempting any adjustment, gather the necessary supplies: orthodontic wax, a pair of sterile nail scissors or orthodontic wire cutters, a clean toothpick or tweezers, and a small mirror. Ensure your hands are washed thoroughly to prevent introducing bacteria into your child’s mouth. Setting up a clean, well-lit space reduces the risk of accidental injury and helps you work with precision.
Identify and Locate the Problem Area Accurately
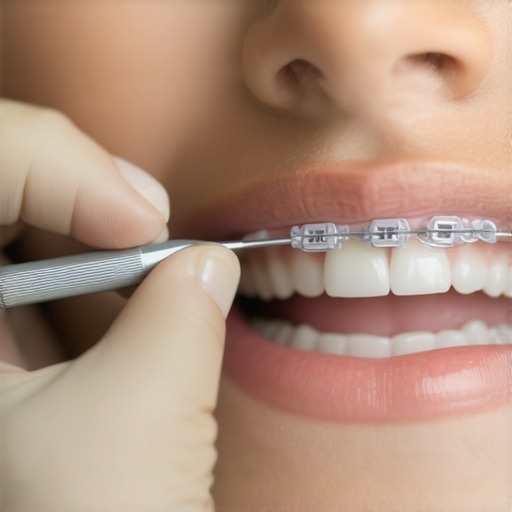
Have your child sit comfortably with a good view of their mouth, using a mirror if needed. Carefully examine the braces, focusing on the wire segment causing discomfort. Look for any protruding or bent wire ends that are poking into the soft tissue. Often, a wire becomes misaligned after an adjustment or eating sticky foods. Remember, patience is key; rushing can cause more harm than good.
Gently Tame and Secure Loosened or Bent Wires
Make the Wire Less Invasive
If a wire end is poking out, use the sterilized tweezers or a clean napkin to gently push the wire back away from the soft tissue. Be extremely gentle to avoid dislodging the entire bracket. If the wire is bent or protruding, carefully clip the tip just beyond the bend, taking care not to cut the entire wire or damage the bracket. When in doubt, cut only a small portion to reduce irritation. Remember, cutting a wire is a temporary fix—schedule a professional adjustment as soon as possible.
Smooth Sharp Edges with Wax or Cotton
Once the wire is secured, mold a small piece of orthodontic wax around the sharp end to create a barrier against the soft tissues. If wax isn’t available, a tiny piece of cotton or gauze can serve as a temporary cushion. This simple step can alleviate immediate discomfort until your next dental appointment.
Test and Confirm Relief
Ask your child to gently bite down and check if the wire still causes irritation. Ensure the wire’s end is tucked away enough that it doesn’t poke again. If the wire feels loose or if you’re unsure about the safety of your adjustments, refrain from further manipulations and contact your orthodontist for guidance. Missteps can lead to additional damage or delays in treatment.
Schedule a Follow-Up Appointment to Adjust or Replace the Wire
This at-home fix is a temporary measure to ease discomfort. Over time, the orthodontist will replace or re-bend the wire to restore proper function. For complex problems like broken brackets or severely misaligned wires, visiting a professional ensures safety and proper progress. It’s also helpful to review how to prevent similar issues, like avoiding sticky or hard foods that can dislodge wires.
In my experience, patience combined with these simple tools allowed me to address my daughter’s sore wires efficiently. One evening, after following these steps, she was able to sleep comfortably without pain. This approach is not foolproof, but it can save you an emergency call and keep your child’s smile on track.
Key Takeaways
- Gather sterilized tools and a clean working environment.
- Identify the problematic wire segment precisely.
- Gently reposition, clip, or cover the wire to prevent further irritation.
- Use orthodontic wax or cotton as a buffer over sharp edges.
- Seek professional help if unsure or if the problem persists.
Many people believe they understand the basics of cosmetic and family dental treatments, but the reality is far more complex. For example, a common misconception about veneers is that they naturally stain over time—that’s only true if you choose low-quality materials or neglect proper care. High-quality porcelain veneers, when cared for correctly, can last years without discoloration, contradicting popular myths.
Are All Teeth Whitening Procedures Created Equal?
In fact, many assume that any whitening treatment will significantly change their smile overnight, but the effectiveness depends greatly on the type of stain and the enamel’s condition. Over-the-counter strips, for instance, may only impact surface stains, while professional bleaching can address deeper discolorations. An important nuance is who should avoid whitening altogether; those with thin enamel or gum sensitivity might risk damage if they opt for aggressive procedures—this is a critical detail often overlooked. Moreover, some people think Invisalign is just about straightening teeth discreetly, but its benefits also include improving bite function and crowding issues that at-home aligners can’t address properly. Bypassing professional consultation can lead to using the wrong aligner type or misjudging treatment duration. A trap many fall into is believing teeth whitening is a one-size-fits-all solution, neglecting underlying issues such as sensitivities or existing restorations that can be negatively affected. For instance, whitening agents don’t work on crowns and veneers, which might result in mismatched shades afterward. To truly optimize your dental aesthetic, understanding the nuances of each treatment is essential. According to an expert review (source: Smile Gum Care), personalized treatment planning based on enamel type, existing restorations, and patient lifestyle leads to the best long-term results. So, before jumping into any procedure, schedule a thorough assessment with your dentist. Remember, what works for one person might not be suitable for another. Have you ever fallen into this trap? Let me know in the comments.
Maintaining optimal oral health for your family requires more than just good brushing habits; it demands the right tools and a strategic approach. Over the years, I’ve tested various dental equipment and software to ensure my loved ones stay on top of their dental health. Today, I want to share the specific tools I recommend for long-term success, especially when managing treatments like veneers, Invisalign, or teeth whitening.
Invest in a Quality Oral Scanner
One game-changer in our routine has been a handheld intraoral scanner like the Ceramill Map 400. This device allows me to capture 3D images of my children’s teeth at home with precision comparable to professional equipment. Regular scans help detect early signs of wear or decay, particularly for those with veneers or sensitive restorations. Using such technology ensures that issues are identified early, preventing costly repairs and maintaining the aesthetic appeal of veneers or whitened teeth.
Utilize Specialized Toothbrushes and Electric Models
When it comes to daily cleaning, I highly recommend a high-quality electric toothbrush, such as the Oral-B Genius X. Its pressure sensors and oscillating-rotating brush heads protect against over-brushing, which can harm delicate veneers or fresh whitening treatments. For kids, I favor the Philips Sonicare for Kids—a gentle yet effective option. These tools not only clean better but also make the routine engaging for children, encouraging longevity and compliance.
Implement Smart Flossing Devices
Flossing often gets overlooked, yet it’s critical for maintaining gum health, especially around orthodontic appliances. I’ve adopted a device like Waterpik Sonic-Fusion—combining flossing and brushing. This multifunctional tool simplifies routine, ensures thorough plaque removal, and prolongs the life of orthodontic appliances or veneers. Plus, it’s gentle, reducing irritation that leads to bleeding or sensitivity over time.
Harness Digital Management Platforms
Staying consistent with multiple treatments can be challenging. That’s why I use a dental management app called SmileCare Tracker. It helps schedule cleanings, track whitening touch-ups, and set reminders for Invisalign trays replacements. Predictive analytics in such platforms project when a certain treatment might need an adjustment, helping us stay proactive rather than reactive. According to a recent dental IT report, integrating digital tools is the next step in personalized, long-lasting family dental care.
How do I maintain these tools over time?
Regular cleaning and calibration are your best friends to keep these tools functioning optimally. Soaking electric brush heads weekly in antibacterial solution, updating digital software every few months, and replacing flossing tips when worn are simple steps that can dramatically extend their lifespan. Additionally, scheduling routine professional check-ups ensures your equipment and treatments stay on track. If you’re interested in how to optimize your family’s dental routine further, consider consulting with a professional about tailored device recommendations.
As technology advances, our capacity to manage long-term dental health becomes more efficient. I predict that in the coming years, AI-driven monitoring systems—like smart toothbrushes with built-in sensors—will become standard, giving us even better insight into oral health trends before issues escalate. For now, investing in quality, specialized tools is a smart move that can save you time and money while keeping your family’s smiles vibrant and healthy.
Ready to elevate your dental routine? Start by trying a smart flosser like the Waterpik Sonic-Fusion—it’s a small change that makes a significant difference in maintaining veneers, whitening results, and overall gum health.
The Lessons I Wish I Learned Sooner About Family Dental Care
This journey with family dentistry, veneers, Invisalign, and teeth whitening has been filled with surprises. One of the most valuable lessons I’ve uncovered is that patience and consistency often beat quick fixes. Trusting the process, rather than rushing every step, allowed my family’s smiles to flourish naturally. Another insight is that proactive maintenance—like regular check-ups and careful at-home care—prevents small issues from becoming costly emergencies. Lastly, I realized that understanding the nuances of procedures like veneers or whitening helps set realistic expectations and makes choosing the right treatment less intimidating.
The Treasured Tools and Resources That Changed Our Routine
Over time, I’ve discovered a handful of tools that truly elevate family dental care. An intraoral scanner like the SmileCare Tracker enables early detection of concerns, saving cost and stress. High-quality electric toothbrushes such as the Oral-B Genius X and fun, gentle flossing devices like the Waterpik Sonic-Fusion ensure daily hygiene is effective and enjoyable. For trusted guidance, I recommend exploring comprehensive resources like expert tips on veneers and smile transformation. These tools and knowledge sources have empowered me to stay ahead of potential issues and make informed decisions for my family’s smile health.
Your Smiling Future Starts Today—Take That First Step
Remember, the path to confident, healthy smiles isn’t about perfection but progress. Small daily habits, combined with the right tools and expert advice, will lead you toward a brighter tomorrow for your family. Don’t wait for dental issues to become emergencies—embrace proactive care now and watch your loved ones’ confidence blossom. Your family’s future smile is worth every effort—start today, and see how far a little knowledge and patience can take you.
What’s one small change you can make today to improve your family’s dental health? Share your thoughts below—I’d love to hear your progress!
}#}# ៤{