The best method for flossing under a permanent lingual retainer
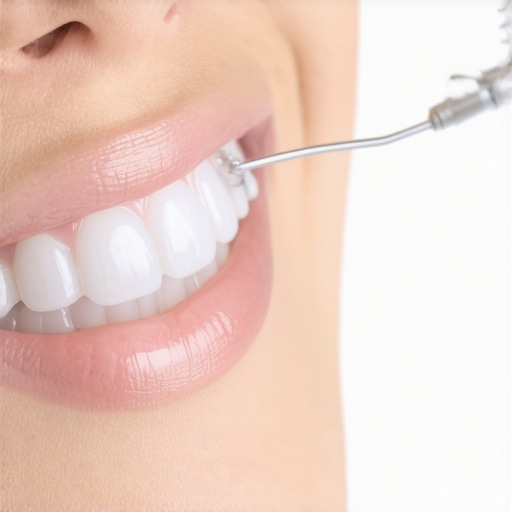
I remember the first time I struggled to floss under my permanent lingual retainer. It was a small, almost invisible wire glued behind my bottom teeth, but it felt like an insurmountable obstacle every time I reached for that floss. I’d yank, poke, and often end up frustrated, thinking I was doing everything wrong. It wasn’t until I realized that I wasn’t alone—so many folks with retainers face the same challenge—that I decided to dig deeper. And let me tell you, this isn’t just about tidying up your teeth; it’s about maintaining your smile’s health and avoiding costly dental problems down the line.
Why Flossing Under Your Lingual Retainer Can Feel Like a Mission Impossible
Having a permanent lingual retainer is a fantastic way to keep your teeth aligned after braces, but it comes with its own set of maintenance quirks. The truth is, standard flossing methods just don’t cut it. The wire acts like an obstacle course, making it tricky to maneuver floss between your teeth and remove plaque effectively. Neglecting this can lead to plaque buildup, cavities, and gum disease—things I learned the hard way early on.
The good news? There are practical, proven techniques to get that floss where it needs to go, easily and comfortably. And that’s what we’re going to explore today. Trust me, once you master this, flossing under your retainer will become just part of your daily routine—no stress, no guilt.
Does Flossing Under a Retainer Really Make a Difference?
Absolutely. Even if it feels like a minor inconvenience, neglecting to floss properly can result in more serious dental issues. Saliva contains bacteria that turn remnants of food into acidic plaque, which attacks tooth enamel and gums. When your retainer wire traps debris, plaque forms quickly, increasing your risk for cavities and gum inflammation. I made the mistake of thinking that brushing alone was enough—big mistake. That’s why thorough flossing is essential.
And surprisingly, a study published in the Journal of Clinical Periodontology shows that meticulous interdental cleaning significantly reduces the risk of periodontal disease, even with orthodontic appliances or retainers in place. So, invest in your health now; your future self will thank you.
Before we dive into the how-to’s, if you’re feeling overwhelmed or unsure about your technique, don’t hesitate to reach out to your dentist. They can offer personalized guidance or even demonstrate the best methods for your specific retainer setup. Remember, maintaining your smile isn’t just about looks; it’s about health.
Now that we understand why it’s crucial, let’s get into the practical steps that will make flossing a breeze for you. The goal is to make it effective, easy, and—most importantly—something you won’t dread every day. Ready? Let’s do this.
Choose the Right Flossing Tools
Start with a floss threader; think of it as a kayak navigating a narrow river—designed to help you weave floss under your retainer wire smoothly. I bought a pack at my local drugstore after a quick trip to the pharmacy, and it changed my flossing game entirely. Contact us for personalized recommendations or to get started on a tailored dental routine.
Select the Proper Floss Type
Opt for waxed floss; it’s like a coated snowboard—glides between teeth easily without snagging. I found that unwaxed floss often tore or caught, especially around the wire, making flossing frustrating. Using waxed floss reduced my frustration and sped up the process. Remember, thick floss can be beneficial if you have broader spaces but might be cumbersome for tight contacts.
Prepare Your Flossing Setup
Cut a piece about 18 inches long; think of it as preparing a shoelace for lacing—better control and less mess. Wrap each end around your middle fingers, leaving about 2 inches in between. This grip gives you the leverage to maneuver precisely. I personally found this setup easier to manage than trying to hold a short piece.
Thread the Floss Through the Wire
Insert the floss threader into your mouth and guide the floss under the retainer wire. It’s like threading a needle—delicate but possible. I struggled my first few times, but practicing made it second nature. Use a gentle back-and-forth motion to avoid tugging on the wire or irritating your gums. If you find this challenging, consider using super floss, which has built-in stiff ends for easier threading.
Tip: Use a Mirror for Better Precision
I found a mirror to be a game-changer—like a GPS for flossing. Position yourself comfortably and look carefully at the target area. This clarity helped me avoid missing spots and prevented accidental pokes or snags.
Clean Between and Around the Wire
Once the floss is threaded, gently slide it up and down between your teeth, wrapping it around each tooth as you go. Think of it as polishing a gemstone—gentle, thorough, and deliberate. Focus on the gum line, where plaque tends to hide, and ensure you’re removing debris effectively. It’s crucial to adjust your angle to match the contours of your teeth for maximum plaque removal.
Pause to Check Your Technique
After a few strokes, pause and inspect your work in the mirror. I discovered that adjusting the floss angle helped reach stubborn spots. Don’t rush—cleaning takes time and patience. Remember, consistent effort over time prevents decay and gum problems, especially around fixed retainers.
Remove and Dispose of Floss Properly
Gently lift the floss out, avoiding a snap that could hurt your gums or dislodge debris into your mouth. Wrap the used floss around your fingers for safe disposal. Always use a fresh section of floss or clean your floss threader for each session to avoid transferring bacteria. Proper disposal is as important as cleaning itself—think of it as tidying up after your work.
Repeat the Process Daily
Consistency is key. Even if it feels tedious at first, developing this as a daily habit will rapidly improve your oral health. Set a reminder or attach flossing to your brushing routine—like brushing your teeth, flossing under your retainer will soon become second nature. Trust me; the small effort today pays off in a healthier, brighter smile tomorrow. For additional tips on maintaining dental appliances or other oral care practices, visit family dentistry resources or check out Invisalign insights to explore complementary orthodontic care techniques.Many misconceptions surround teeth whitening, family dentistry, Invisalign, and veneers, often leading patients to make choices based on myths rather than facts. One common trap is believing that whitening treatments are purely cosmetic, overlooking their potential impact on tooth sensitivity if not performed correctly. In reality, professional whitening strategies are tailored to individual enamel health, and unqualified DIY methods can cause long-term damage, as highlighted in recent studies. When it comes to family dentistry, many assume that dental visits are only necessary when problems arise, but regular check-ups are crucial for early detection of issues like decay and misalignment. For example, early intervention in children’s dental health can prevent more invasive treatments later—more details are available in our comprehensive guide on creating a healthy smile for every generation.
People also often think Invisalign is solely for straightening teeth invisibly, but an advanced nuance is its role in managing bite issues and preventing jaw problems. Misusing or neglecting the aligners can lead to relapse or uneven wear, which might compromise the results. According to orthodontic experts, adhering strictly to the prescribed wear schedule is key to long-term success; more insights can be found in our article on disrupting the path to a perfect smile.
Veneers are frequently misunderstood as a quick fix for crooked or stained teeth, but a critical nuance is understanding the difference between veneers and crowns. Veneers are conservative restorations suitable for aesthetic improvements, yet they can weaken the underlying tooth if misapplied or overused. An article comparing veneers and crowns explains how choosing the right option can preserve tooth integrity and prevent future complications.
Why do some whitening treatments backfire despite promises of instant results?
This question taps into the advanced understanding of enamel health, pH levels, and the importance of professional guidance. Over-the-counter whitening products often contain strong chemicals that, when used improperly, cause enamel erosion and increased sensitivity. The American Dental Association emphasizes the importance of consultation with a dental professional before embarking on whitening regimes to prevent unintended damage.
**Have you ever fallen into this trap?** Let me know in the comments. Taking the time to understand these nuances ensures your dental health isn’t compromised by myths or shortcuts. For a personalized assessment or to clarify your specific concerns, feel free to reach out today. Remember, knowledge is your best tool in maintaining a beautiful, healthy smile.Maintaining your dental health after undergoing treatments like whitening, Invisalign, or veneers requires the right tools backed by proven methods. I personally swear by certain equipment and routines that keep my smile looking its best over time. One essential item I use daily is an electric toothbrush with oscillating-rotating action, such as the Sonicare DiamondClean. Its superior plaque removal capabilities, especially along the gum line, help prevent staining and maintain the work done by professional whitening or veneers. Regular ultrasonic cleaning can also extend the lifespan of dental appliances—investing in a small ultrasonic cleaner for your retainers or aligners ensures they stay free from bacteria and odors.
For interdental cleaning, I recommend a water flosser like Waterpik, which uses pressurized water to remove debris from hard-to-reach spots without damaging delicate tissues. This becomes especially invaluable when managing fixed retainers; traditional floss can be tricky, but a water flosser simplifies this process while ensuring thorough cleaning.
On the software side, using a CAD/CAM dental app, such as Cerec, enhances communication with your dentist for future veneer replacements or adjustments. These tools enable high-precision planning and facilitate rapid, accurate restorations, ensuring long-term satisfaction.
Looking ahead, the trend is shifting toward smart dental devices that sync with mobile apps—think Bluetooth-enabled toothbrushes that track brushing habits and provide real-time feedback. This integration offers a personalized approach to dental maintenance, helping you catch issues early. As the technology evolves, expect smarter, more intuitive tools to become the norm.
***How do I keep my dental tools working effectively over time?*** Regular maintenance is key: rinse all devices after use, replace brush heads every three months, and follow manufacturer instructions for deep cleaning. For example, replacing your sonic toothbrush’s brush head regularly prevents bacteria buildup and maintains cleaning efficiency. Additionally, scheduling routine professional cleanings ensures that any hidden plaque or tartar is addressed before it becomes a bigger problem.
If you’re considering upgrading your home care arsenal, I recommend trying a water flosser for enhanced interdental cleaning. Pair it with an electric toothbrush and you’ll notice a marked difference in your oral health. Plus, maintaining these tools properly extends their lifespan and keeps your smile shining for years to come.
For more personalized advice or to explore the latest in dental technology, don’t hesitate to contact us at [Smile Gum Care](https://smilegumcare.com/contact-us). A little investment in quality tools today can save you from more extensive treatments tomorrow. Remember, consistent, high-quality maintenance is what keeps all your hard work—be it whitening, veneers, or Invisalign—looking flawless long-term.
Lessons That Changed My Approach to Smile Care
One of the hardest lessons I learned was how crucial daily flossing under a retainer truly is—no matter how busy life gets. Skipping this step might seem minor, but it can lead to unexpected cavities or gum issues down the line. I also realized that investing in quality tools, like a water flosser or electric toothbrush, made a significant difference in my routine, saving time and discomfort. Lastly, understanding that your dental routine should evolve with your treatments—like veneers or Invisalign—helps keep those transformations lasting longer and looking better. These insights have made my smile healthier and more radiant, and I hope they do the same for you.
Tools and Resources That Made My Smile Journey Easier
Over the years, I’ve found that the right equipment can be game-changing. I recommend trying a water flosser, like Waterpik, especially if you have a fixed retainer—it’s surprisingly gentle yet effective. An ultrasonic cleaner keeps aligners or retainers bacteria-free, prolonging their lifespan. For educational support, I turn to trusted sources like Family Dentistry guides and Invisalign insights, which offer practical tips and the latest advancements. These tools and information empower me to care for my smile confidently and effectively.
Your Smile’s Future Starts Today
Maintaining a bright, healthy smile is a lifelong journey that combines the right knowledge, tools, and habits. Remember, small daily efforts—like proper flossing and routine check-ups—pay off tremendously over time. Whether you’re protecting your veneers, managing Invisalign, or just aiming for whiter teeth, each step you take now builds toward a future with fewer dental worries and more confidence in your smile. Don’t wait for problems to arise; start implementing these habits today and watch your smile transform into your most beautiful asset. I believe in your journey to a healthier, more radiant smile—go for it!