The Quickest Way to Get a Stuck Piece of Popcorn Out of Your Gums
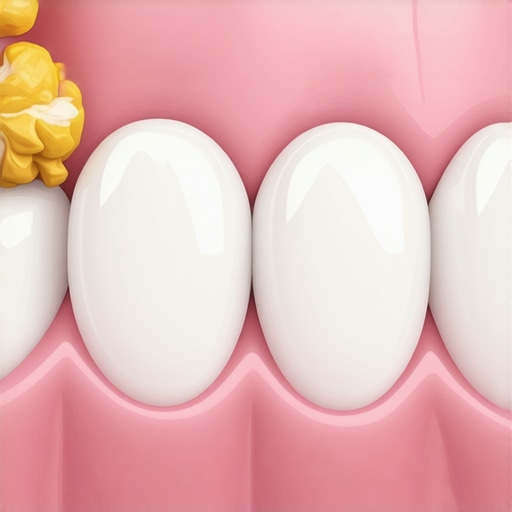
I was halfway through a bucket of buttery popcorn during a summer blockbuster when it happened—that sharp, irritating sensation of a hull wedging itself deep into my gum line. I spent the next two hours poking at it with my tongue, then my fingernail, and eventually a folded-up straw wrapper. Big mistake. I ended up with a sore, swollen mess that lasted three days. If you are feeling that scratchy pressure right now, I promise you there is a much faster and safer way to handle it than the frantic digging I attempted. Today, we are going to get that stubborn kernel out without causing a dental emergency.
Stop Poking and Try These Gentle Techniques Instead
Look, I know the urge to use a toothpick—or worse, a paperclip—is strong when you are uncomfortable. I once learned the danger of using safety pins to pick at your braces or teeth the hard way, and it is never worth the risk of a puncture. When a popcorn hull gets stuck, it is usually because the curved shape of the kernel has created a suction-like seal against your gum tissue. You do not need force; you need a way to break that seal. My first go-to is always a vigorous warm salt water rinse. It sounds too simple, but the warmth helps the tissue relax while the salt reduces the immediate swelling that is locking the hull in place. If you have been neglectful with your oral hygiene lately, knowing how to stop your gums from bleeding when you haven’t flossed in weeks can save you some panic if the area starts to look a bit red during this process. It is also significantly more difficult if you are wearing dental appliances, which is why I eventually had to master the secret to removing popcorn hulls from under a bridge to help my neighbor out last year.
Is it really dangerous to just leave the hull alone?
You might be tempted to just go to sleep and hope your saliva dissolves it overnight. Unfortunately, popcorn hulls are made of cellulose, which the human body cannot break down easily. According to the American Dental Association, leaving foreign objects trapped in the gingival sulcus can lead to localized inflammation and potentially a painful gum abscess. Have you ever been so desperate to get a kernel out that you reached for something totally non-dental? I want to make sure we get you back to a comfortable smile using tools that actually belong in a family dentistry setting rather than a toolbox. Let’s look at the mechanical ways to slide that hull out without a single drop of blood.
Try the Dental Floss Knot Trick First
The most effective tool in your arsenal is likely sitting in your medicine cabinet right now. Regular flossing is great for plaque, but a popcorn hull is a physical barrier that requires more surface area to move. Think of your floss as a tiny lasso. To increase its effectiveness, tie a small, simple knot in the middle of a piece of waxed floss. Gently guide the floss between the teeth where the hull is trapped. Once it is below the contact point, pull the floss through so the knot travels against the gum line. I remember trying this with my nephew when he had a hull stuck in his back molar. He was already fussing, and his gums were bright red. On the third pass of the knot, that little yellow shell popped out like a cork from a bottle. It was an instant win for his comfort. #IMAGE_PLACE_HOLDER_B#
The Right Way to Move the Floss
Do not saw back and forth aggressively. Instead, use a gentle ‘C’ shape motion, wrapping the floss around the side of the tooth. This ensures you are reaching into the sulcus—the little pocket where the hull likes to hide—without slicing into the tissue. If you find that your gums are particularly sensitive afterward, you might need to know the best way to soothe a sore mouth after an orthodontic adjustment or general irritation.
Flush the Debris with Low-Pressure Water
If the floss trick does not work, it is time to try irrigation. A water flosser is your best friend here, but you have to be careful with the settings. Set it to a low or medium pressure. Aim the tip at a 90-degree angle toward the gum line, right where the hull is wedged. The pulsating water can often get behind the hull and break the suction that is holding it against your tooth. If you do not have a water flosser, you can use a plastic syringe with a curved tip—the kind often given out after wisdom tooth surgery. This targeted stream is much more effective than a general mouth rinse. I have personally found that using room-temperature water is far more comfortable than cold, as the area is likely already a bit inflamed.
Gently Sweep with an Interdental Brush
Sometimes a hull is stuck just barely out of reach of floss. This is where an interdental brush—those tiny ‘Christmas tree’ brushes—comes in handy. They are designed to fit into the gaps that a standard toothbrush misses. I often tell parents that family dentistry tips for kids should always include having these on hand for snack-related emergencies. Wet the brush and gently insert it into the space. The bristles can catch the edge of the hull and pull it forward. Be careful not to force a brush that is too large into a small gap, as this is a common reason why your gums feel sore after switching to a harder toothbrush or other dental tool. If you feel like your teeth are generally prone to trapping food, you might notice that your teeth feel furry only a few hours after brushing, which is a sign that plaque is building up and making the surfaces stickier for things like popcorn.Once you have successfully navigated the immediate crisis of a stubborn popcorn hull, it is tempting to think your dental maintenance is back on autopilot. However, this is usually where I see the most educated patients fall into sophisticated traps. They know the basics, but they get tripped up by nuances that can turn a simple cosmetic upgrade into a long-term headache. For instance, many people think that because they have healthy teeth, they can experiment with DIY whitening. This leads to one of the biggest ‘oops’ moments I see in the clinic: the mistake of using whitening strips on dental bonding. Natural enamel lightens, but resin does not, leaving you with a patchy, two-toned smile that is expensive to fix. If you have ever felt that sharp, electric shock during a treatment, you probably need to know how to manage the zingers after a professional whitening session rather than just pushing through the pain and risking permanent pulp damage.
Why Do My Expensive Veneers Look Gray in Certain Lighting?
This is a question that often catches patients off guard after they have spent thousands on their smile. You might assume the material is stained, but the reason your veneers look gray in certain lighting often has more to do with the underlying tooth preparation or the translucency of the porcelain. If the veneer is too thin or the bonding agent was not opaque enough, the natural darkness of the tooth beneath shows through in fluorescent light. It is a common reason why your veneers look fake and how to avoid it during the initial consultation process. According to a study published in the Journal of Evidence-Based Dental Practice, improper application of high-concentration whitening agents can alter enamel microhardness; similarly, the optical properties of porcelain require a master’s touch to mimic natural dentin. #IMAGE_PLACE_HOLDER_C#
Ditch the Idea That 18 Hours of Aligner Wear is Enough
If you are using clear aligners, you have likely heard the common myth that you can ‘cheat’ a little on your wear time as long as the trays still fit. This is a dangerous misconception. I have seen countless cases of ‘tracking’ issues because of the problem with wearing your aligners for only 18 hours a day. Your teeth need constant, low-level pressure to remodel the bone around the roots. When you leave them out for too long, the teeth begin to relapse almost immediately, which is why your jaw feels tight every time you put a new tray in. This constant back-and-forth movement—known as ‘jiggling’—can actually lead to root resorption if you aren’t careful.
The Truth About Choosing a Provider for Your Family
When it comes to managing these complex issues, where you go matters more than the brand name of the service. There is the subtle difference between a corporate clinic and local culpeper family dentistry that often goes overlooked until something goes wrong. Corporate clinics often prioritize volume, while a local family practice focuses on the long-term history of your oral health, from that first popcorn hull incident to your eventual 2025 aesthetic upgrades. Have you ever fallen into one of these ‘advanced’ dental traps, like over-whitening or skipping aligner hours? Let me know in the comments!
Stop Guessing and Start Using the Right Tools
It is one thing to achieve a perfect smile, but keeping it that way is an entirely different game. After years of trial and error with various gadgets, I have narrowed down my ‘must-haves’ to a very specific list. First, if you aren’t using a high-quality water flosser, you are leaving your oral health to chance. I personally use the Waterpik Aquarius because of its ten pressure settings; I find that the lower settings are essential for gently cleaning around delicate work, whereas the higher settings are the secret to removing popcorn hulls from under a bridge or tight spaces. Manual floss is great, but water irrigation reaches into the gingival pockets where bacteria love to hide. For those with cosmetic work, avoid the charcoal trend at all costs. According to Dr. Gordon Christensen of Clinical Research Associates, the abrasive nature of many ‘whitening’ toothpastes can actually micro-scratch the glaze on porcelain restorations, leading to a dull finish. Instead, I stick to low-abrasion pastes that prevent the reason your porcelain veneers feel gritty to your tongue after a few months of use. #IMAGE_PLACE_HOLDER_D#
How do I maintain my smile’s brightness and alignment over time?
Consistency is the boring truth behind every Hollywood smile. If you’ve invested in Invisalign, you cannot skip the cleaning phase. I’ve seen too many patients wonder why your clear aligners have started to look cloudy, only to find they’ve been using hot water or harsh soaps. I recommend using specialized cleaning crystals or an ultrasonic cleaner—it’s the only way to ensure the trays stay truly transparent. For whitening, it is all about maintenance. If you are a caffeine addict like me, you need to learn how to keep your coffee habit without ruining your new veneers or natural whitening results. I always suggest rinsing with water immediately after your morning cup to neutralize the acids. If you do get a sensitive spike, knowing how to manage the zingers after a professional whitening session with a potassium nitrate gel can keep you from abandoning the treatment entirely.
Future-Proof Your Teeth with These High-Tech Shifts
Looking ahead to 2025 and beyond, the trend is moving away from reactive ‘fixing’ and toward bio-regenerative care. We are seeing a massive shift toward AI-integrated apps that sync with your toothbrush to track enamel wear in real-time. I predict that within five years, we will see ‘smart’ retainers that can notify your dentist the moment your teeth begin to shift. This level of oversight is why I always emphasize family dentistry tips for kids; if we can build these habits early using technology, the next generation might avoid the heavy restorative work we face today. Do not wait for a problem to arise before you upgrade your toolkit. I challenge you to swap your manual brush for a pressure-sensing electric model this week—your gums will thank you for the break from aggressive scrubbing. Let’s keep that investment protected.
Hard-Won Lessons from My Worst Dental Mistakes
I used to think that scrubbing harder meant cleaner teeth, but I quickly learned that why your gums feel sore after switching to a harder toothbrush is usually due to micro-trauma rather than actual cleanliness. The biggest ‘lightbulb moment’ for me was realizing that most dental emergencies, like that stubborn popcorn hull, happen when we are distracted or rushed. I have since learned that slowing down and using the right technique is more valuable than any expensive gadget. Another major realization? Thinking I could skip my professional visits because I used a high-end brush was a mistake; I learned the real cost of skipping your six-month cleaning the hard way when a tiny, preventable issue turned into a major procedure. Consistency beats intensity every single time.
The Pro Toolkit That Saves My Teeth Daily
If you are serious about your oral health, you need more than just a manual toothbrush. I swear by my Waterpik for getting into those tight gaps—it is actually the secret to removing popcorn hulls from under a bridge or around dental work. For anyone looking to brighten their smile safely, I recommend checking out teeth whitening secrets for a sparkling smile in 2025 to avoid the common pitfalls of aggressive DIY kits. I also keep an ultrasonic cleaner on my counter for my night guard; it is the most effective way to prevent why your clear aligners have started to look cloudy or develop an odor. Finally, I always choose low-abrasion pastes to ensure I never have to wonder the reason your porcelain veneers feel gritty to your tongue after only a few months of use.
#IMAGE_PLACE_HOLDER_E#
Taking the First Step Toward a Lifetime of Smiles
Whether you are currently dealing with a temporary popcorn crisis or planning a full aesthetic makeover with veneers made simple, remember that your daily habits are your greatest ally. Your dental journey does not have to be perfect from day one, but it should be informed by expert advice rather than social media trends. By choosing a dedicated family dentistry provider, you are setting yourself up for a healthy, confident smile that lasts well into 2025 and beyond. Do not wait for the next ‘zinger’ to take action—start upgrading your routine tonight.
Have you ever had a minor dental mishap that completely changed how you view your daily brushing routine? Let me know in the comments below!