The Best Way to Handle a Chipped Front Tooth in a Toddler

It happened in slow motion. One second, my two-year-old was sprinting across the kitchen tiles with a plastic dinosaur; the next, there was a sickening thud followed by a scream that shattered the afternoon peace. When I scooped him up, I didn’t see blood at first—I saw a jagged, white gap where half of his front incisor used to be. I panicked. I actually spent five minutes crawling on the floor looking for the fragment, thinking I could just superglue it back on. Spoiler: don’t do that. That was my first big mistake in the world of family dentistry, and I’m here to make sure you don’t repeat it. If you’re staring at your toddler’s lopsided smile right now, take a deep breath. We are going to get through this. Today, I’m sharing the exact blueprint for handling a chipped tooth without losing your mind, including when it is a true emergency and when you can actually afford to wait until morning.
Stop the Panic and Check for These Three Things First
Before you call every dentist in a fifty-mile radius, you need to be a bit of a detective. Is there bleeding? Is the tooth wobbly? Most importantly, is your little one acting like themselves? According to the American Academy of Pediatric Dentistry, nearly 50% of children will experience some form of tooth trauma during childhood, so you are definitely not alone. My mistake was focusing only on the aesthetics. I didn’t realize that a chip can sometimes lead to an infection if the pulp or the nerve is exposed. If you see a tiny red or pink dot in the center of the break, that’s your signal to move fast. If the edge is just sharp and irritating their lip, you can actually use a little dental wax to smooth things over until your appointment.
Is a chipped baby tooth really worth a dental bill?
I get it. It is a baby tooth; it is going to fall out eventually, right? That’s what I told myself for about an hour while I hovered over my phone. But here is the reality: those tiny teeth are space-holders for the permanent ones. If a chip goes untreated and gets infected, it can actually damage the adult tooth waiting underneath. Plus, nobody wants their kid to stop smiling because they are self-conscious. Whether you need a simple smoothing or a bit of pediatric dental bonding, getting a professional set of eyes on the situation is non-negotiable. Have you ever had one of those heart-in-your-throat moments where your kid took a tumble? Reach out and let me know how you handled the stress! I’ll be waiting to hear your stories as we dive into the specific repair options next.
Rinse the Mouth and Save the Fragment Immediately
First, grab a lukewarm glass of water and have your child rinse. This isn’t just about hygiene; it’s about seeing the damage clearly without a layer of juice or food debris in the way. If you found the piece of tooth, put it in a small container of milk. Milk has a similar pH and chemical makeup to the inside of a mouth, which helps keep the tooth cells alive—though for a baby tooth, this is usually more about having the fragment for the dentist to inspect than actually reattaching it. If the chip left a sharp corner, you can fix the sharp edge on a broken tooth with dental wax temporarily. This prevents them from shredding their inner lip or tongue while you are in transit. My son kept poking the gap with his tongue, which only made him cry harder; the wax was a total lifesaver that stopped the sensory overload and allowed him to calm down enough for me to drive safely.
Smoothing Edges versus Restorative Bonding
Most dental visits for a chipped baby tooth go one of two ways depending on the severity. If the chip is small and purely cosmetic, the dentist will likely perform an enameloplasty. It sounds fancy, but it just means they are sanding down the rough edges so it doesn’t cause soft tissue irritation. It is quick, painless, and usually doesn’t require any numbing agent. However, if a large chunk is missing, the dentist might recommend ensuring family dental care standards are met through composite bonding. They apply a tooth-colored resin, shape it to match the original tooth, and cure it with a specialized blue light. I had a minor meltdown during our appointment because I noticed his other teeth looked much whiter than the resin. The dentist explained that it is common for permanent teeth to look yellow compared to baby teeth, and they strive to match the resin to the current primary tooth shade for a natural look.
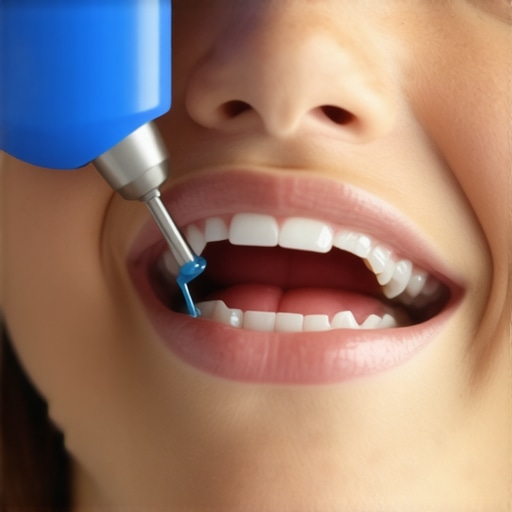
During our repair, my son was so squirmy that the dentist warned me that if he continued grinding his teeth at night, the bonding might pop right off within weeks. This is a common hurdle with toddlers, as their bite is constantly shifting.
Watch for Color Changes in the Coming Weeks
The dental drama doesn’t always end when you leave the office. You need to keep a trauma watch for at least two weeks following the incident. If the tooth starts turning dark grey, brown, or even slightly pink, it means the blood flow or the nerve has been affected. A dark tooth is essentially a bruise inside the bone. In many cases, the tooth will stay that way until it falls out naturally, but family dentistry professionals need to monitor it to ensure an abscess doesn’t form. If your kid is active in sports, now is the time to look into store-bought mouthguards for active kids to prevent a second round of dental emergency bills. One thing I learned the hard way: don’t let them eat anything crunchy for at least 24 hours. I gave my son a carrot stick the next day, and the tiny click of the repair failing was a sound I will never forget. We were right back in the chair two hours later. Stick to yogurt, applesauce, and smoothies until you are sure the repair has set and the initial inflammation has subsided.
Most people believe that if they just blast their teeth with more peroxide, they will eventually hit that blinding white status. Here is the contrarian truth: your teeth have a saturation point. Once you hit that limit, additional whitening doesn’t make them whiter; it actually makes the enamel translucent. This allows the dark shadows of the back of your mouth to show through the tooth, which is often the real reason your teeth look gray instead of yellow. If you’ve been aggressively bleaching and your smile looks duller, you have likely overshot the mark. Understanding these teeth whitening secrets for a sparkling smile is about chemistry, not just brute force application.
Stop Chasing That Neon-White Hollywood Smile
The biggest ‘oops’ factor I see in my years of following ensuring family dental care standards is the attempt to whiten existing dental work. It is a common trap: a patient gets a filling or a crown, decides they want a whiter smile a year later, and applies heavy-duty strips. Here is the nuance: porcelain and composite resin do not porous like natural enamel. Avoiding the mistake of using whitening strips on dental bonding is crucial because you will end up with a ‘patchwork’ smile where your natural teeth are bright, but your dental work remains its original, darker shade. If you are planning a makeover, you must whiten your natural teeth first, then match the restorative work to that new shade.
Why does professional whitening fail for some people?
It isn’t always about the strength of the gel. According to a study published in the Journal of Evidence-Based Dental Practice, tooth sensitivity and ‘rebound’ (where teeth look darker just days after treatment) are often tied to the dehydration of the tooth rather than actual pigment removal. This is why you might experience those sharp ‘zingers’ after a session. Learning how to manage the zingers after a professional whitening session is just as important as the treatment itself. If your enamel is naturally thin, you might be fighting a losing battle with traditional bleaches. In those cases, looking into how to transform your smile with veneers might be the only way to achieve the shade you want without compromising your nerve health.
Don’t Fall Into the Aligner Cloudiness Trap
When it comes to modern orthodontics like Invisalign innovation and invisible braces, the most common mistake isn’t just forgetting to wear them—it’s how you clean them. Many people use hot water or abrasive toothpaste, which creates microscopic scratches. These scratches catch bacteria and pigments, which is why your clear aligners have started to look cloudy over time. Once they are cloudy, they are no longer ‘invisible.’ Furthermore, the chemistry of what you drink matters. Even if a drink is clear, like a gin and tonic or a sparkling flavored water, the acidity can get trapped between the plastic and your teeth, leading to rapid enamel erosion. Have you ever fallen into this trap of thinking a clear drink was ‘safe’ while wearing your trays? Let me know in the comments below! We’re all learning these sophisticated dental hacks together to keep our family’s smiles healthy for the long haul.
After years of trial and error, I’ve realized that the tools you use in your bathroom are just as important as the ones your dentist uses in the chair. For anyone wearing trays, I’ve stopped recommending a toothbrush for cleaning. Instead, I’ve switched entirely to a small ultrasonic cleaner. It uses high-frequency sound waves to create microscopic bubbles that implode against the surface of your aligners, literally blasting away the plaque that causes cloudiness. This is honestly the only way to stop your clear aligners from smelling like old saliva. I noticed a massive difference in the clarity of my trays within 48 hours of making this switch.
Ditch the Scrubbing for an Ultrasonic Buzz
Manual brushing often leaves tiny micro-scratches on the surface of your dental work. These scratches are like magnets for coffee and tea pigments. If you have moved into the world of porcelain, you’ve probably wondered how to keep your coffee habit without ruining your new veneers. The trick isn’t just the tool; it’s the chemistry. I personally use a pH-neutral foaming cleanser inside my ultrasonic bath. According to a study published in the Journal of Clinical Periodontology, using ultrasonic vibration combined with a specialized cleanser reduces the bio-burden on dental appliances by over 99% compared to traditional mechanical brushing. It’s a game-changer for anyone trying to maintain that ‘day one’ sparkle. 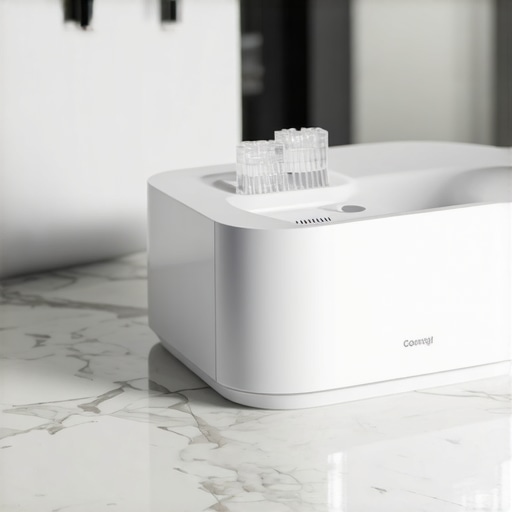
Protect Your Investment from the Inside Out
Maintenance isn’t just about cleaning; it’s about structural integrity. If you’ve invested in a smile makeover, you have to realize that your teeth are still under constant pressure. In my house, the rule is simple: teeth are for chewing, not for opening packages or biting fingernails. If you forget this, you’ll quickly find out how to keep your veneers from chipping if you grind your teeth—by getting a high-quality night guard. I predict that in the next five years, we’ll see home 3D-printing for dental guards becoming mainstream, allowing us to refresh our protection every few months without a trip to the office. Until then, treat your work like fine porcelain, because that’s exactly what it is. I’ve also started looking into the ‘bio-hacking’ side of dentistry. It’s not just about what you remove (like plaque), but what you encourage. For instance, the future of family dentistry is likely going to involve microbiome-balancing probiotics. Instead of just killing all bacteria with harsh rinses, we’ll be seeding our mouths with ‘good’ microbes that naturally prevent the acid production that ruins veneers made simple.
How do I keep my dental work looking brand new for a decade?
The secret is consistency and the right ‘retention’ mindset. Many people think the job is done once the braces come off or the veneers are bonded. But the ‘relapse’ is real. You need to understand how to stop your teeth from shifting after your braces come off by sticking to your retainer schedule religiously. For my veneers, I schedule a specific ‘polish’ appointment every year. It’s different from a regular cleaning; it uses a specialized diamond-impregnated paste that restores the luster that everyday toothpaste can dull. If you’re serious about longevity, my best advanced tip is this: swap your morning acidic orange juice for a green smoothie, but remember to rinse with water immediately after to prevent that gritty feeling. Ready to step up your routine? Try switching to an ultrasonic cleaner this week and see if your aligners don’t stay crystal clear until your next tray swap!
The Lessons I Learned the Hard Way About Toddler Smiles
The hardest lesson I learned wasn’t about the tooth itself, but about the anxiety that comes with it. I realized that a chip is rarely just a physical break; it’s a reminder of how quickly things change. Another lightbulb moment was discovering that dental bonding and veneers require a completely different maintenance mindset than natural teeth. If you treat them like tools, you will learn why your veneers might pop off if you use your teeth as tools very quickly. I also realized that you can’t force oral hygiene; sometimes you just need to know how to brush a toddlers teeth when they wont open their mouth to keep the peace. Lastly, dental wax is more than a tool; it’s a psychological safety net for a scared child.
What I Keep in My Medicine Cabinet
I swear by a few specific items that have saved our smiles more than once. First is an ultrasonic cleaner, which is a game-changer for aligners and night guards. Second, I keep a sensitive-formula gel to avoid the sensitivity often found in teeth whitening secrets for a sparkling smile. Third, I follow the latest updates on ensuring family dental care through professional sources. These tools ensure that we are proactive rather than reactive.
#IMAGE_PLACEHOLDER_E#
Confidence Starts with One Tiny Step
Whether you’re dealing with a toddler’s first tooth trauma or maintaining your own smile makeover, remember that consistency is your best friend. A single chip doesn’t define a smile, and modern family dentistry offers solutions for every possible hiccup. Don’t let the fear of a dental bill or a squirmy kid keep you from seeking professional help. Your child’s future self will thank you for the foundation you’re building today. Have you ever had a midnight dental emergency that turned out to be a false alarm? Let me know your story below!