
The mistake of using whitening strips on dental bonding
I remember standing in my bathroom, squinting at the mirror under those harsh fluorescent lights. I had a big reunion coming up, and I wanted my smile to pop. I slapped on those “extra-strength” whitening strips, thinking I was being smart. Forty-five minutes later, I peeled them off and nearly cried. My natural teeth were glowing, but my front-tooth bonding? It stayed the exact same dull, off-white shade. I looked like a literal checkerboard. It was a classic rookie mistake, and honestly, one of the most frustrating moments of my dental journey. I felt like I had wasted time and money, only to make my smile look worse than when I started. Today, I am going to save you from that same sinking feeling by explaining exactly why these strips fail on dental work and how you can actually achieve a uniform, bright smile without the mismatched mess.
Stop Before You Bleach Your Bonding Into Oblivion
We often think of our teeth as one solid surface, but once a dentist adds composite resin to the mix, the rules of the game change completely. I made the mistake of assuming that professional-grade gel would just soak through everything. It doesn’t. If you have noticed that your teeth look yellow in certain bathroom lighting despite your best efforts, you might be dealing with this exact contrast issue.
Is it actually possible to whiten dental bonding at home?
The short answer is a painful “no.” I learned the hard way that dental bonding is made of composite resin, which is essentially a non-porous material. According to the American Dental Association, whitening treatments are designed to penetrate the microscopic pores of natural enamel to break down stains, but composite resin is unaffected by peroxide. When you use those strips, you are essentially trying to bleach a plastic countertop—it just is not going to happen. In fact, if you aren’t careful, you might end up needing to transform your tooth aesthetics in 2025 entirely because the contrast becomes so jarring. This is why many people eventually decide to stop brushing your veneers like they are real teeth and treat them with the specific care they deserve. Have you ever tried to whiten your teeth only to realize your fillings or crowns were “immune” to the gel? It is a total gut-punch, isn’t it? Before you buy another box of strips, let’s look at why this mismatch happens and what your actual options are for a cohesive look.
Map Out Your Mouth Before You Touch a Whitening Strip
The first thing you need to do is conduct a literal audit of your own mouth. Grab a flashlight and a mirror. You need to identify every spot where your natural enamel ends and the composite resin begins. When I was dealing with my own ‘checkerboard’ disaster, I realized I had forgotten about a tiny chip on my lateral incisor that had been filled years ago. Because that resin is like a piece of plastic fused to a sponge, the sponge (your tooth) gets brighter while the plastic stays dull. If you notice that your teeth look gray instead of yellow and how to fix it becomes your primary concern, it is often because the translucent properties of the bonding are clashing with the new, brighter shade of your natural tooth. Think of it like trying to paint a room where half the wall is wood and the other half is drywall without using a primer; the finish will never look the same unless you treat the materials differently. 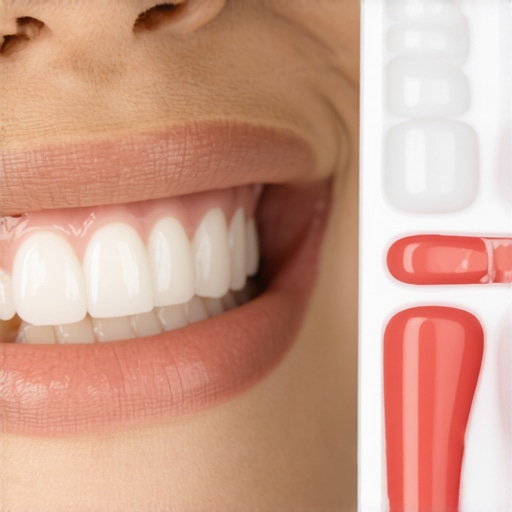
Follow the Professional Sequence That Actually Works
The absolute ‘Golden Rule’ of cosmetic dentistry is that you must whiten before you do any restorative work. If you are starting from scratch, you want to use the ultimate guide to teeth whitening options in 2025 to reach your goal shade first. Once you hit that perfect brightness, you wait about two weeks. This ‘rest period’ allows the oxygen levels in your enamel to stabilize so the bonding agent can actually stick. I once rushed this process and tried to get a filling redone just three days after a heavy bleaching session. The composite literally wouldn’t bond correctly, and it popped off while I was eating a piece of toast a week later. It was messy, expensive, and totally avoidable. By waiting, you ensure the dentist can match the resin to your permanent ‘new’ white, creating a seamless transition.
Manage the Stains Without Damaging the Resin
If your bonding is already there and it looks dark, it might not be the material itself changing color, but rather surface stains clinging to the edges. This is where the real reason your coffee stains keep coming back after a cleaning becomes relevant. Composite resin is softer than enamel and develops microscopic scratches over time. I once made the mistake of using a gritty charcoal toothpaste to try and ‘scrub’ my bonding white. All I did was create more scratches, which then soaked up more coffee and red wine, making the bonding look even dingier. Instead of abrasive DIY hacks, use a soft-bristled electric brush and non-abrasive paste to keep the surface smooth.
Upgrade Your Surface Rather Than Bleaching It
When the contrast between your natural teeth and your dental work is too high, sometimes the only real fix is a material upgrade. If you have large areas of bonding that keep staining or looking ‘flat’ compared to your natural teeth, you might need to look into veneers vs crowns which is right for your smile. Porcelain is far superior to composite resin because it resists staining and reflects light much more like natural enamel. If you do go this route, be careful with your shade selection; you should learn how to stop your veneers from looking too white and fake so your smile looks healthy and vibrant rather than like a row of fluorescent chiclets. Transitioning from old, stained bonding to high-quality porcelain can solve the ‘matching’ problem once and for all.But here is the thing that even the self-proclaimed experts on social media get wrong: more peroxide does not always equal a better smile. In fact, there is a dangerous tipping point where you move past ‘bright’ and straight into ‘translucent.’ Most people assume that if a 10% gel works well, a 35% gel will work three times as fast. In my experience, this is the quickest way to end up with ‘gray’ teeth. When you over-bleach, you strip away the essential minerals that give your enamel its opacity. According to a study published in the Journal of Dentistry, excessive whitening can lead to a significant decrease in enamel microhardness, making the tooth appear almost glass-like. This is why you need to know how to tell if your veneers are too white for your complexion or if your natural teeth are losing their healthy luster. If your teeth start looking blue or gray at the edges, stop immediately; you are literally seeing through your teeth.
Why More Bleach Usually Means More Problems
The obsession with instant results often leads to the ‘rebound effect.’ When you use high-concentration strips, they dehydrate the tooth, which makes it look incredibly white for about 48 hours. But once the tooth rehydrates with saliva, the shade drops back down, leading people to bleach again too soon. This cycle is a recipe for chronic sensitivity. Instead of chasing a higher percentage, focus on top teeth whitening strategies today that prioritize consistency over intensity. I have seen so many people ruin their enamel by thinking they could ‘power through’ the pain. If you are experiencing ‘zingers,’ your body is telling you that your pulp is inflamed. Ignoring this can lead to long-term nerve issues that no amount of cosmetic work can fix. 
Can you safely whiten your teeth while undergoing Invisalign treatment?
This is the advanced question I get most often from people who are finally fixing their alignment. The common belief is that since the trays are clear, you can just pop some gel in and whiten while you straighten. This is a massive ‘oops’ waiting to happen. If your treatment involves ‘attachments’—those little tooth-colored bumps the dentist glues to your teeth—the whitening gel cannot penetrate the resin. If you whiten during your treatment, you will end up with a ‘polka dot’ smile once the attachments are removed. The enamel under the bump will be the old, yellowed shade, while the surrounding tooth will be bright. It is far better to focus on achieving a perfect smile discreetly by keeping your trays clean and waiting until the attachments are off to start your whitening journey.
Watch Out for the Invisible Attachment Trap
Another nuance people miss is the interaction between whitening agents and old dental work. If you have a crown or a bridge, the margins (the area where the restoration meets the gum) are magnets for microscopic plaque. Using harsh whiteners can irritate these areas, leading to gum recession that exposes the dark metal or opaque ceramic underneath. This is often why your professional whitening didn’t work as well as last time; you might be fighting against receding gums rather than just surface stains. Additionally, if you are using abrasive methods, please read up on the truth about charcoal toothpaste and your tooth enamel before you permanently scratch your expensive dental work. Have you ever fallen into this trap where you thought more was better, only to end up with sensitive or gray-looking teeth? Let me know in the comments.Once the mismatched bonding is gone and your teeth are finally the same shade, you enter the ‘defense’ phase. I learned the hard way that maintaining that result requires more than just luck. For those of us who have moved on to invisalign innovation invisible braces changing smiles in 2025, the biggest hurdle is keeping the hardware pristine. I personally swear by the iSonic ultrasonic cleaner. If you are wearing any kind of removable appliance, you must learn about properly cleaning a night guard to prevent bacterial buildup. I use mine every single morning because a standard toothbrush just cannot vibrate at the 42,000 Hz frequency needed to shake off the calcified plaque that eventually makes your smile look dull. 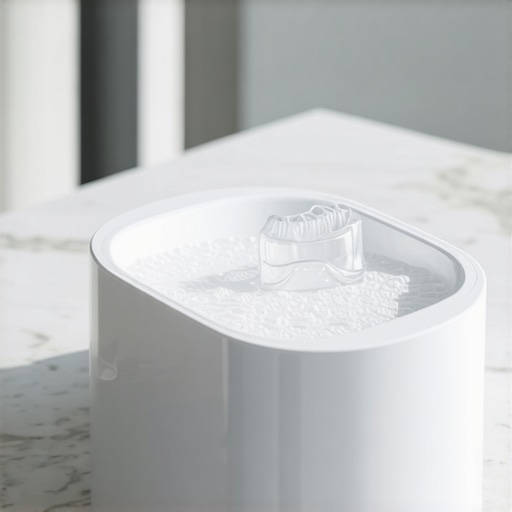
How do I maintain my professional dental work over time?
Maintaining a high-end smile is about preventing the ‘micro-stains’ from turning into permanent discoloration. I use a specific pH-balanced mouthwash rather than the alcohol-heavy stuff you find in the bargain bin. According to a technical report by the Cochrane Oral Health Group, maintaining a neutral oral pH is the single most effective way to prevent the secondary decay that often forms at the edges of veneers and bonding. If you ignore this, you will find yourself back in the chair sooner than you would like.
The Future of At-Home Smile Tracking
I also keep a very close eye on the technological shifts in the industry. For example, the real reason culpeper dentists are swapping traditional x-rays for 3d scans is to create a digital ‘baseline’ of your mouth. In the very near future, I predict we will see smartphone apps that can compare a weekly photo of your teeth to these 3D scans to flag gum recession or enamel wear before it is even visible to the naked eye. This kind of proactive tech is going to be essential for ensuring family dental care what parents need to know in 2025. It is no longer about waiting for something to hurt; it is about monitoring the ‘wear and tear’ in real-time. If you have just finished your treatment and had your dentist remove aligner attachments without damaging your enamel, my best advice is to treat your teeth like a luxury car—regular detailing and the right fuel are non-negotiable. I want you to try one thing this week: ditch the manual floss and use a high-quality water flosser at least once a day for 14 days straight. You will be shocked at how much cleaner those bonding edges actually feel.
What My Most Expensive Dental Mistake Taught Me
I used to think I could outsmart the chemistry of my own mouth. The biggest lesson I learned is that peroxide is a tool for organic enamel, not for composite resin. If you have dental work, no amount of whitening gel will change its shade. Another “lightbulb moment” was realizing that how to tell if your veneers are too white for your complexion is more about skin undertones than just picking the brightest bleach possible. Lastly, always prioritize health over shade; a sensitive tooth is far harder to fix than a slightly off-white one. Focus on the integrity of the material before you chase the color.
The Professional Toolkit I Swear By for Maintenance
#IMAGE_PLACEHOLDER_E#
To keep everything looking seamless, I rely on a few specific items. First, a high-quality water flosser is non-negotiable for cleaning the margins where bonding meets the gum, preventing that tell-tale dark line. Second, you should browse the ultimate guide to teeth whitening options in 2025 to see which professional systems actually work with restorative plans. I also keep a pH-balanced rinse on hand to protect the “seal” of my dental work. Finally, if you are struggling to choose a permanent fix, weighing veneers vs crowns which is right for your smile is the best way to ensure long-term color stability. I trust these resources because they focus on longevity rather than a quick, temporary fix.
Own Your Smile Even If It Is Not Perfect Yet
Your smile is a journey, not a destination. It is okay if your transition from old bonding to a brighter look takes a few months. When you focus on teeth whitening secrets for a sparkling smile in 2025 at 1248, you are investing in your confidence for years to come. Don’t let a “checkerboard” setback stop you from reaching your goals. The future of your smile looks bright when you treat your teeth with the respect they deserve. Have you ever accidentally made your dental bonding look worse with whitening strips? Let me know your story in the comments below!