The Secret to Flossing Under a Dental Bridge Without Frustration
I remember the first time I tried to floss beneath my dental bridge. It was a morning chaos — hurriedly grabbing floss, desperately trying to thread it without ripping the bridge out, and ending up frustrated enough to skip the whole process entirely. That lightbulb moment made me realize something crucial: regular flossing isn’t enough when you have special dental work like a bridge. In fact, neglecting proper flossing under a bridge can lead to plaque buildup, cavities, and even gum disease around the supporting teeth. Today, I want to share with you the secret that finally made flossing manageable and even painless for me. We’re going to tackle those stubborn, hard-to-reach spots, so you can maintain your healthy smile without frustration or fear.
Now, why does this matter so much right now?
With advancements in dental technology, many people opt for dental bridges to restore their smile and chewing function. But along with that convenience comes a common challenge: how to effectively clean beneath these bridges without pulling it out or causing discomfort. Regular floss isn’t designed for the tight spaces and specific architecture of dental bridges, and many people don’t realize their standard technique is actually worsening the problem. According to the American Dental Association, failing to properly clean under dental restorations can lead to secondary caries and periodontal issues. That’s why mastering the right flossing technique is essential for long-term oral health.
If you’ve ever felt like flossing under your bridge is a frustrating, futile task — you’re not alone. I used to think I was doing enough, but early on, I made the mistake of using regular dental floss without considering specialized tools. That approach almost caused more harm than good, leading to bleeding, discomfort, and even damage to the delicate tissues around my bridge. The good news? There are simple, proven methods that can turn your flossing routine into a quick, comfortable process. In the next sections, I’ll walk you through the exact technique I use and recommend, so you can finally tackle that stubborn area without the fuss.
Ready to say goodbye to flossing frustration? Let’s dive into the practical steps that will transform your dental cleaning routine and help you keep that beautiful, healthy smile for years to come.
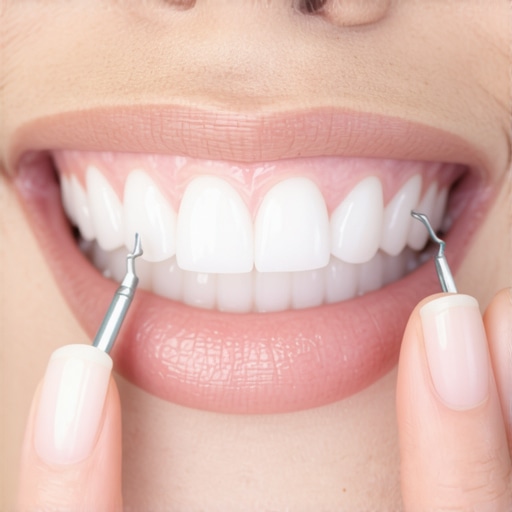
Choose the Right Flossing Tool for Your Bridge
First, select a flossing method suited for dental bridges, such as super floss or a floss threader. I recommend the floss threader for its precision. I remember my first attempt with a floss threader—messy but effective—after watching a quick tutorial. Using a floss threader is like threading a needle, but for your teeth, making the process smoother and less frustrating.
Properly Thread the Floss
Insert the floss threader through the small gap beneath your bridge. Grab an adequate length of floss—about 18 inches—and thread it through the loop of the threader. Pull the floss completely through, leaving an extra few inches for control. I once thought I could get away with a short piece, which led to tangles and wasted time, but now I always prepare enough beforehand.
Find the Perfect Position
Hold the floss taut against the side of your supporting tooth. Gently slide the floss into the space beneath the bridge, aiming to reach just below the gumline. Don’t force it; ease it in to avoid injuring delicate tissues. I learned this the hard way when I tried to rush, causing bleeding. Slow, deliberate movement is key to avoid discomfort and ensure cleanliness.
Clean with Controlled Movements
Use a gentle back-and-forth motion to remove plaque and debris. Once the floss is beneath the bridge, curve it around the tooth in a C-shape and glide it up and down. Repeat on the adjacent supporting tooth. Remember, the goal is to clean the area thoroughly without injuring the gums. I once skipped this step and ended up with tender, swollen gums—never again.
Repeat Effectively
Move to the next support tooth, repeating the threading and cleaning process. Use a fresh section of floss if necessary to prevent bacteria spread. My routine now involves changing the floss every couple of teeth, which keeps the process hygienic and effective. This step ensures every area gets proper attention, preventing cavities and gum issues.
Finish and Rinse Your Mouth
Once you’ve flossed beneath your bridge, rinse with water or an antibacterial mouthwash. This helps remove loosened debris and reduces bacteria. I noticed my breath felt fresher immediately after, boosting my confidence. Regular rinsing complements the cleaning process and maintains optimal oral health.
Keep Up the Routine Daily
Consistency is vital. Make flossing beneath your bridge a daily habit, just like brushing. Over time, this routine becomes second nature, much like once I seamlessly inserted and pulled out my floss threader without fuss. Maintaining this discipline prevents plaque buildup and preserves your smile’s health, especially important if you’ve opted for veneers or considered teeth whitening enhancements to boost your confidence.
Many individuals assume that all dental cosmetic procedures are straightforward and universally suitable, but in reality, there are nuanced pitfalls that even experienced patients often overlook. For example, a common misconception about veneers is that they are a quick, painless fix for any smile imperfection. However, many don’t realize that veneer placement is a delicate process requiring careful assessment of enamel thickness and underlying dental health. Opting for veneers without thorough consultation can lead to over-preparation or mismatched aesthetics, resulting in a less natural look or even the need for replacement sooner than expected.
Similarly, in family dentistry, a widespread myth is that children’s dental visits aren’t crucial until their permanent teeth emerge. Conversely, early dental assessments can identify issues like misalignment or decay before they escalate. Overlooking the importance of early intervention may cause more complex problems later, costing more and impacting long-term oral health.
When it comes to teeth whitening, many think that over-the-counter products are just as effective as professional treatments. But, in practice, store-bought options often lack the potency to significantly whiten teeth or can cause sensitivity if misused. Professional whitening, discussed thoroughly in the linked guide, ensures safety and superior results, especially when combined with expert advice on managing potential side effects.
As for veneers and crowns or Invisalign maintenance tips.
Remember, investing time in maintaining your dental tools is an investment in your ongoing oral health. Proper tools paired with disciplined routines will keep your smile shining brightly for years to come.
What I Wish I Knew Before Tackling Flossing and Dental Bridges
One of the most eye-opening lessons I learned was that patience and the right tools can transform a frustrating routine into a manageable part of my dental care. I once believed that a regular floss was enough, but understanding the importance of specialized flossing techniques revealed that neglecting proper methods could do more harm than good. This insight has deepened my appreciation for the small but vital steps that protect my long-term smile.
Another revelation came when I discovered that the seemingly minor act of threading floss beneath a bridge requires mindfulness and specific skills. Rushing through this step often led to bleeding or dislodging the bridge, reminding me that careful execution is key. Embracing patience and slow movements not only made the process painless but also ensured my gums and supporting teeth remained healthy.
Lastly, I realized that maintaining my dental health depends on consistency and investing in quality tools. Using a water flosser with ultrasonic tips and an electric toothbrush with pressure sensors has made daily routine more effective and enjoyable. Integrating technology into my routine has been a game-changer, boosting my confidence that I’m doing the best I can for my smile’s longevity.
Tools That Changed My Approach to Dental Hygiene
My top recommendation is a **PulseJet Water Flosser**, prized for its targeted cleaning around bridges, crowns, and implants. Its adjustable pressure settings and ultrasonic tips allow for precision, making the hard-to-reach spots much easier to tackle. I trust this tool because it minimizes discomfort and maximizes cleanliness, which is crucial when caring for fixed restorations.
Complementing my water flosser is a **Sonicare DiamondClean** electric toothbrush, which gently yet thoroughly cleans my enamel while protecting sensitive areas. Its built-in timers and pressure sensors keep me mindful of brushing duration and force, preventing accidental damage—especially important after aesthetic procedures like whitening or veneer placement.
For my Invisalign trays, I now rely on a **UV sterilizer** and **enzymatic cleaning spray**, which ensure my aligners remain bacteria-free and odorless. Regular sterilization has significantly extended the lifespan of my trays and maintained their clarity, aligning with expert advice on appliance hygiene. These tools have truly helped me stay proactive in preserving my investment in orthodontic treatment.
Your Next Step Towards a Healthier Smile
Taking charge of your dental routine with the right tools and techniques doesn’t just improve your oral health—it empowers you to enjoy your smile confidently every day. The future of dental care is increasingly personalized and high-tech, making it easier than ever to achieve and maintain perfect health. I encourage you to explore innovative products like water flossers and smart toothbrushes, which are shaping the next generation of oral care.
What’s one change you’re willing to try today to better care for your dental health? Share your thoughts below—I’d love to hear your experiences and tips on mastering dental routines around bridges and restorations!