The secret to removing popcorn hulls from under a bridge
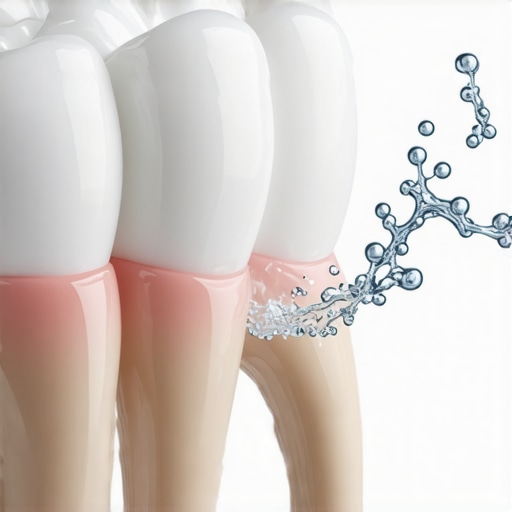
I’ll never forget the Tuesday night I almost lost my mind over a single, buttery kernel shell. I was halfway through a movie when—crunch—a sharp popcorn hull wedged itself right under my three-unit bridge. It felt like a tiny dagger was stabbing my gums every time I breathed. My first instinct? Grab a wooden toothpick and start digging. That was my first big mistake. I ended up with sore, bleeding gums and a bridge that felt more sensitive than it should, purely because I panicked. If you’re currently poking at your mouth with a paperclip or a fingernail, please, stop right now. Today, I’m going to show you the gentle method for clearing that debris safely, so you don’t end up needing an emergency repair from your family dentistry expert. Have you ever had a snack turn into a dental crisis in the middle of a movie?
Get that sharp shell out without ruining your dental work
One of the trickiest parts of having a bridge is that the space underneath—the pontic area—is a magnet for food. When a popcorn hull gets in there, it’s not just annoying; it can lead to real inflammation. According to the American Dental Association, trapped debris can cause localized gingivitis and gum swelling in as little as 24 to 48 hours. When I was new to my bridge, I didn’t realize how delicate the gum-to-restoration seal was. I thought I could just safely remove a piece of popcorn by brute force. I learned the hard way that you need a strategy, not strength. You might be weighing veneers vs crowns or bridges for your next procedure, but regardless of what’s in your mouth, the goal is always the same: keep it clean without the trauma.
Will my bridge actually pop off if I pull too hard?
This is the fear that kept me up at night after my first hull incident. We spend a lot of money and time on our smiles, and the idea of a popcorn hull causing a total failure is terrifying. The truth is, your bridge is sturdy, but your gum tissue is incredibly soft. If you’ve ever wondered how to clean a dental bridge without getting floss stuck, you know the struggle of navigating those tight gaps. I’ve found that the key isn’t more pressure, but better tools. I once made the mistake of using a piece of sewing thread because I couldn’t find my floss threaders—let’s just say my gums didn’t forgive me for a week. We’re going to look at the tools that actually work, like water irrigators and specialized bridge cleaners, so you can go back to enjoying your snacks without the fear of a permanent wedge.
Blast away the debris with a gentle water stream
Imagine your dental bridge is like a low-clearance overpass on a highway. Most things pass through fine, but that one jagged popcorn shell is the oversized truck that’s wedged tight. You cannot just yank the bridge down to get it out; you have to flush it out. My absolute go-to tool is a water flosser. It is essentially a power washer for your mouth, but you have to use it with finesse. When I first got my bridge, I made the mistake of turning the pressure dial all the way to ten, thinking more force meant a faster clean. It felt like a needle hitting my gums and caused instant swelling. Instead, you should fill the reservoir with lukewarm water—cold water on a sensitive restoration can feel like a lightning bolt.
Why low pressure is your best friend
Start on the lowest setting and lean over the sink with your mouth slightly open to let the water drain. Aim the tip at a 90-degree angle toward the gap where the pontic (the fake tooth) meets the gum line. Use short bursts of water rather than a continuous stream. This pulsing action often mimics the effect of ‘wiggling’ the shell loose without pushing it deeper into the tissue. Following basic family dentistry tips-creating a healthy smile for your kids at 0915 can help you build these gentle habits early on so you don’t default to aggressive scrubbing. 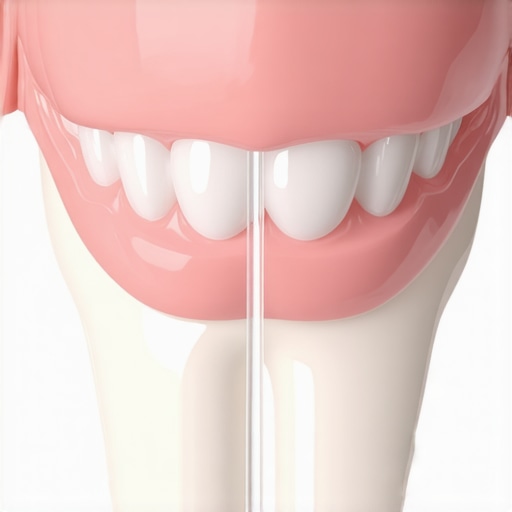
Navigate the gap with a reliable floss threader
If the water flosser doesn’t do the trick, it’s time to bring in the floss threaders. These look like large, flexible plastic needles and they are the only way to get traditional floss into the tunnel under your bridge. I remember a wedding I attended where a piece of corn-on-the-cob got stuck right before the photos. I had to retreat to a tiny bathroom stall and use a threader with zero mirror guidance. Because I had practiced the ‘pull-through’ method, I was able to clear it without a single drop of blood.
The C-shape technique for stubborn hulls
Take a piece of high-quality, waxed floss and loop it through the eye of the threader. Gently guide the stiff end of the threader into the space between your natural tooth and the bridge. Once it’s through, pull the floss until it’s tucked under the bridge. Instead of pulling up and down—which can irritate the gums—move the floss in a back-and-forth ‘sawing’ motion. If you notice that the simple reason your gums bleed only when you floss one specific tooth is actually due to this trapped debris, don’t panic. Just keep the motion steady and light.
Use interdental brushes for the final sweep
For those wider gaps, an interdental brush can be a lifesaver. These tiny brushes are designed to slide into spaces where a normal toothbrush can’t reach. They are particularly effective because the bristles can ‘hook’ onto the edge of a popcorn hull and pull it out as you withdraw the brush. Maintaining your bridge with these tools is as critical as learning how to properly clean a night guard to prevent bacterial buildup. If you have a combination of dental work, remember to stop brushing your veneers like they are real teeth by avoiding abrasive pastes while you focus on the bridge area. Carefully insert the brush, give it one or two gentle turns, and pull it straight out.Once you’ve cleared that stubborn popcorn hull and eased the immediate irritation, it’s worth taking a closer look at the long-term health of your smile. Most people treat high-end restorative work like a finished project, but true expertise in family dentistry suggests that maintenance is actually where the real work begins. I’ve seen many patients fall into the trap of thinking their dental work is indestructible, only to face expensive repairs because they ignored the biological nuances of their restorations.
Why that ‘one-hour’ whitening might fail you
A common myth persists that professional whitening is a universal fix for every smile. However, you might find that why your professional whitening didn’t work as well as last time has less to do with the dentist and more to do with your dentin’s saturation point. According to a study in the Journal of Dentistry, peroxide concentration is often less important than the contact time and the initial ‘VITA shade’ of the tooth. For those with deep-seated discoloration, the best way to whiten teeth that have been stained by tetracycline usually involves a multi-month protocol rather than a single ‘power’ session.
What happens if your teeth look gray rather than yellow?
This is the ultimate nuance that even seasoned dental patients often miss. Traditional bleaching agents are designed to break down organic yellow pigments. If your teeth have a gray or bluish hue, they are often reflecting light differently due to structural thinning or mineral changes. In these cases, you need to understand why your teeth look gray instead of yellow and how to fix it. Often, the answer lies in deciding between veneers vs crowns to actually mask the underlying shade rather than trying to bleach through it.
Avoid the ‘refrigerator door’ look on your veneers
One of the biggest ‘oops’ factors I encounter is the obsession with the whitest possible shade. If you don’t learn how to stop your veneers from looking too white and fake, you end up with a smile that lacks the natural translucency of real enamel. Genuine teeth are semi-transparent at the biting edge; if your restoration is a solid, opaque block of white, it screams ‘artificial.’  When you are at the lab phase, always ask to see the ‘incisal translucency’ in natural light. Have you ever fallen into this trap of wanting the brightest shade only to realize it looks artificial? Let me know in the comments. Finally, remember that your new smile requires a different toolkit. You must stop brushing your veneers like they are real teeth. Abrasive ‘whitening’ toothpastes can actually micro-scratch the surface of porcelain, making it more prone to future staining. Whether you are navigating Invisalign innovation or managing ‘zingers’ and sensitivity, the secret is always to work with your biology, not against it. If you do experience sharp pains post-procedure, knowing how to manage the zingers after a professional whitening session can save you a lot of unnecessary discomfort.
Once you have spent the time and money to perfect your smile, whether through top teeth whitening strategies or orthodontic work, the real challenge begins. You aren’t just maintaining teeth; you are managing a high-performance biological system. I have found that relying on a basic manual toothbrush is like trying to detail a Ferrari with a kitchen sponge. To keep my bridge and my natural enamel in sync, I had to upgrade my toolkit to include items that actually respect the physics of a restoration.
Ditch the manual brush for a high-frequency pulse
I switched to a sonic toothbrush years ago, but not just any model. I look for ones that offer a ‘sensitive’ or ‘gum care’ mode. The Journal of Clinical Periodontology has highlighted that high-frequency sonic vibrations can actually disrupt subgingival biofilm up to 2 millimeters beyond where the bristles actually touch. This is a game-changer for someone like me with a bridge. It means the vibration is doing the heavy lifting in those tight spaces where I can’t see. When I use a sonic brush, I don’t press down; I just let the bristles hover. If you are still scrubbing, you risk that receding gum line that makes people ask why your gums look grey around your old porcelain crowns. It’s almost always because the metal substructure is being exposed by aggressive brushing habits.
How do I maintain my dental restorations over the next ten years?
The secret is consistency and the right ‘chemical’ environment. It’s not just about the tools, but also the pH of your mouth. I’ve started using hydroxyapatite toothpastes, which are becoming a staple in family dentistry. Unlike fluoride, which creates a protective layer, hydroxyapatite actually bonds to your enamel to ‘fill in’ the microscopic scratches that develop over time. This is especially important for the natural teeth surrounding your veneers or bridges. If those teeth decay, the entire restoration is at risk. By keeping the foundation strong, you ensure that your tooth aesthetics remain flawless for the long haul.
Let an ultrasonic bath save your Invisalign from the cloudy look
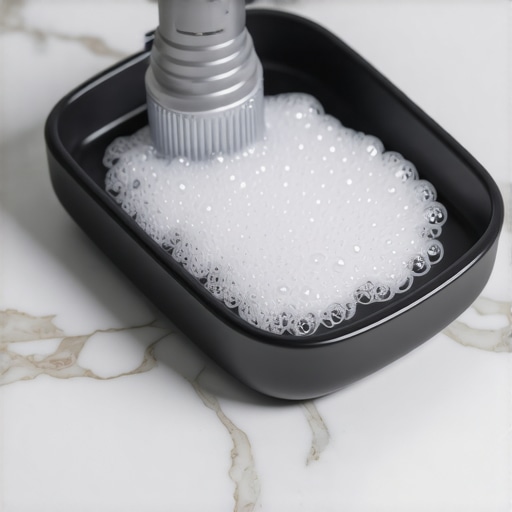
If you are currently using Invisalign secrets to straighten your teeth, you know the struggle of the ‘cloudy tray.’ No matter how much you brush them, they eventually get a funk. I discovered that a dedicated ultrasonic cleaner—a little pod that vibrates at 42,000Hz—is the only way to truly deep clean them. It uses cavitation bubbles to blast away the proteins that cause odors. This tool is also the best way to clean the stubborn gunk out of your night guard without using abrasive chemicals that can degrade the plastic. Plus, knowing the best way to store your clear aligners when you aren’t wearing them (hint: always in a dry case, never a napkin!) will prevent the growth of the bacteria that lead to that vinegar-like smell.
AI and bio-active minerals will define the next decade of dentistry
I predict that in the very near future, we won’t just be guessing if our maintenance is working. We are already seeing Invisalign innovation using virtual monitoring, and soon, our toothbrushes will likely use AI to tell us exactly which tooth has a spike in acidity. We are moving toward a ‘proactive’ rather than ‘reactive’ model of care. If you want to stay ahead of the curve, my top advice is this: invest in a high-quality water flosser and an ultrasonic cleaner this week. It is a small price to pay to protect the thousands you’ve invested in your smile. Try using the water flosser with a 50/50 mix of water and alcohol-free mouthwash for one week and see how much better your gums feel.
My biggest dental blunders and what they taught me
Looking back on my journey with restorative dentistry, the most important realization I had was that ‘permanent’ dental work is a bit of a misnomer. While the materials are incredibly durable, the bond between the restoration and your body is dynamic and requires constant attention. I used to think that because porcelain can’t get cavities, I didn’t need to be as diligent. I was wrong. The margin where the bridge meets the gum is the front line of defense against decay. Transitioning to a mindset of stewardship rather than just ‘owning’ a smile is what family dentistry building healthy smiles for every generation is truly about.
Another lightbulb moment came when I realized that localized irritation isn’t just an annoyance; it’s a signal. If you find yourself constantly searching for the ultimate guide to teeth whitening options in 2025 because your natural teeth are staining faster than your veneers, it’s a sign your cleaning technique needs an overhaul. My gums used to be perpetually puffy, and I blamed the bridge, but the real culprit was my aggressive brushing. Learning to be ‘gentle but thorough’ changed everything.
#IMAGE_PLACEHOLDER_E#
The three-piece toolkit that saved my smile
I don’t leave my oral health to chance anymore. My daily routine centers around three specific tools that provide a level of clean you simply can’t get with a manual brush and string floss. First, a high-quality water flosser is non-negotiable for anyone with a bridge or implants. It flushes out the microscopic debris that threaders often miss. Second, I swear by my ultrasonic cleaning pod. If you use a night guard or aligners, this is the only way to avoid the ‘cloudy’ buildup that harbors bacteria. Finally, I’ve learned the value of ensuring family dental care what parents need to know in 2025 by modeling these habits for my kids, showing them that technology and technique go hand-in-hand.
I also recommend finding a provider who understands the nuance of your specific case. Understanding the subtle difference between a corporate clinic and local culpeper family dentistry can be the deciding factor in whether your bridge lasts ten years or thirty. A local expert who knows your history will notice small changes in your gum health long before they become emergencies.
Your path to a lifetime of confident smiles
At the end of the day, your smile is one of your most valuable assets, both for your health and your self-esteem. Don’t let a stray popcorn hull or a bit of plaque discourage you from maintaining the investment you’ve made. By combining the right tools with a gentle, consistent routine, you can enjoy the full benefits of modern family dentistry without the fear of unexpected repairs or sensitivity. Have you ever struggled with a piece of food that just wouldn’t come out from under your bridge? Let me know your tips in the comments below!